50J Multistage Coilgun Pistol cal. 6mm – a project I made real 5 years ago. The construction process of this pistol is quite well-documented on photos. Enjoy….


Readily wound coils: the first one uses 0,8mm enamelled copper wire (forgotten how many turns it had, probably around 200) and has the biggest capacitor bank. The other 2 coils have thinner wire, but also more turns for a stronger magnetic field. For faster discharge and smaller dimensions their capacitor banks are smaller.
The TO220 Parts are SCRs (2N6509) for 250A surge current. The phototransistors with their IR-LEDs are also waiting to be built in. The circuit board contains single-transistor circuits for the optical projectile detection. A 7805 is also on board.
The gun has got 2 power supplies: a 9V battery for the control circuit and laser sight and AA batteries for charging the capacitors…
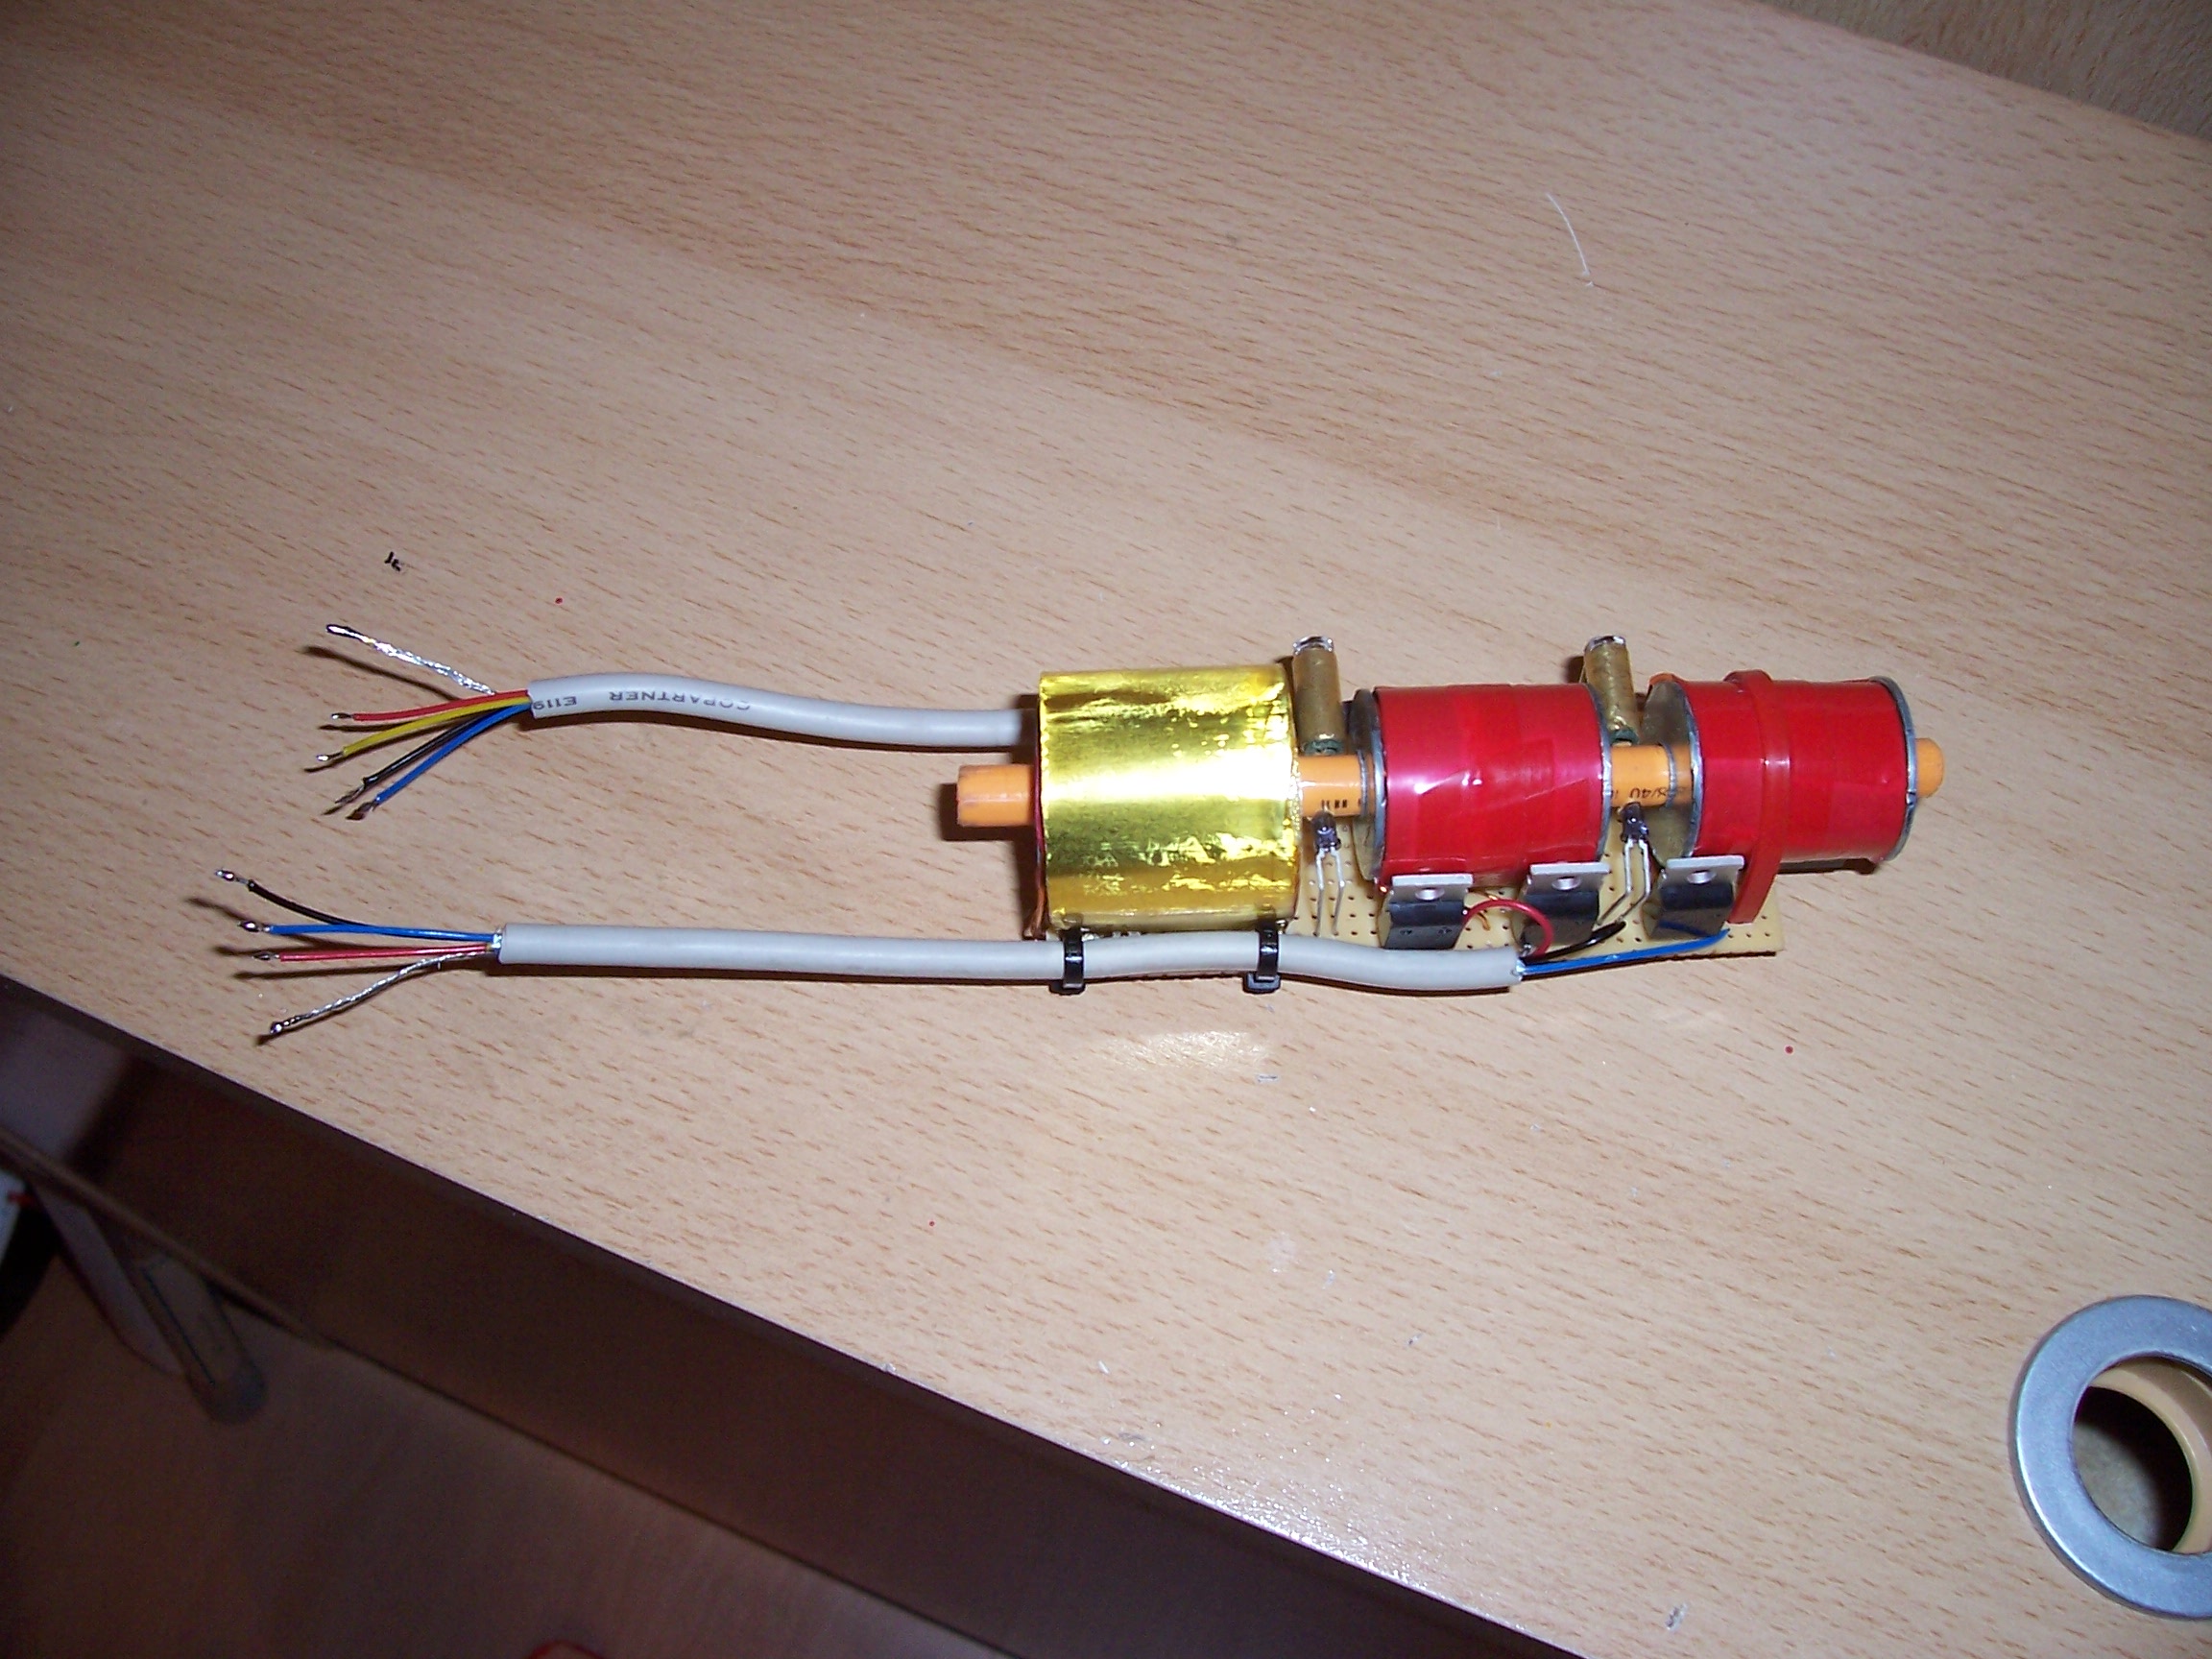
Here we have the completed accelerator stage with optical projectile detection, coils and Thyristors.
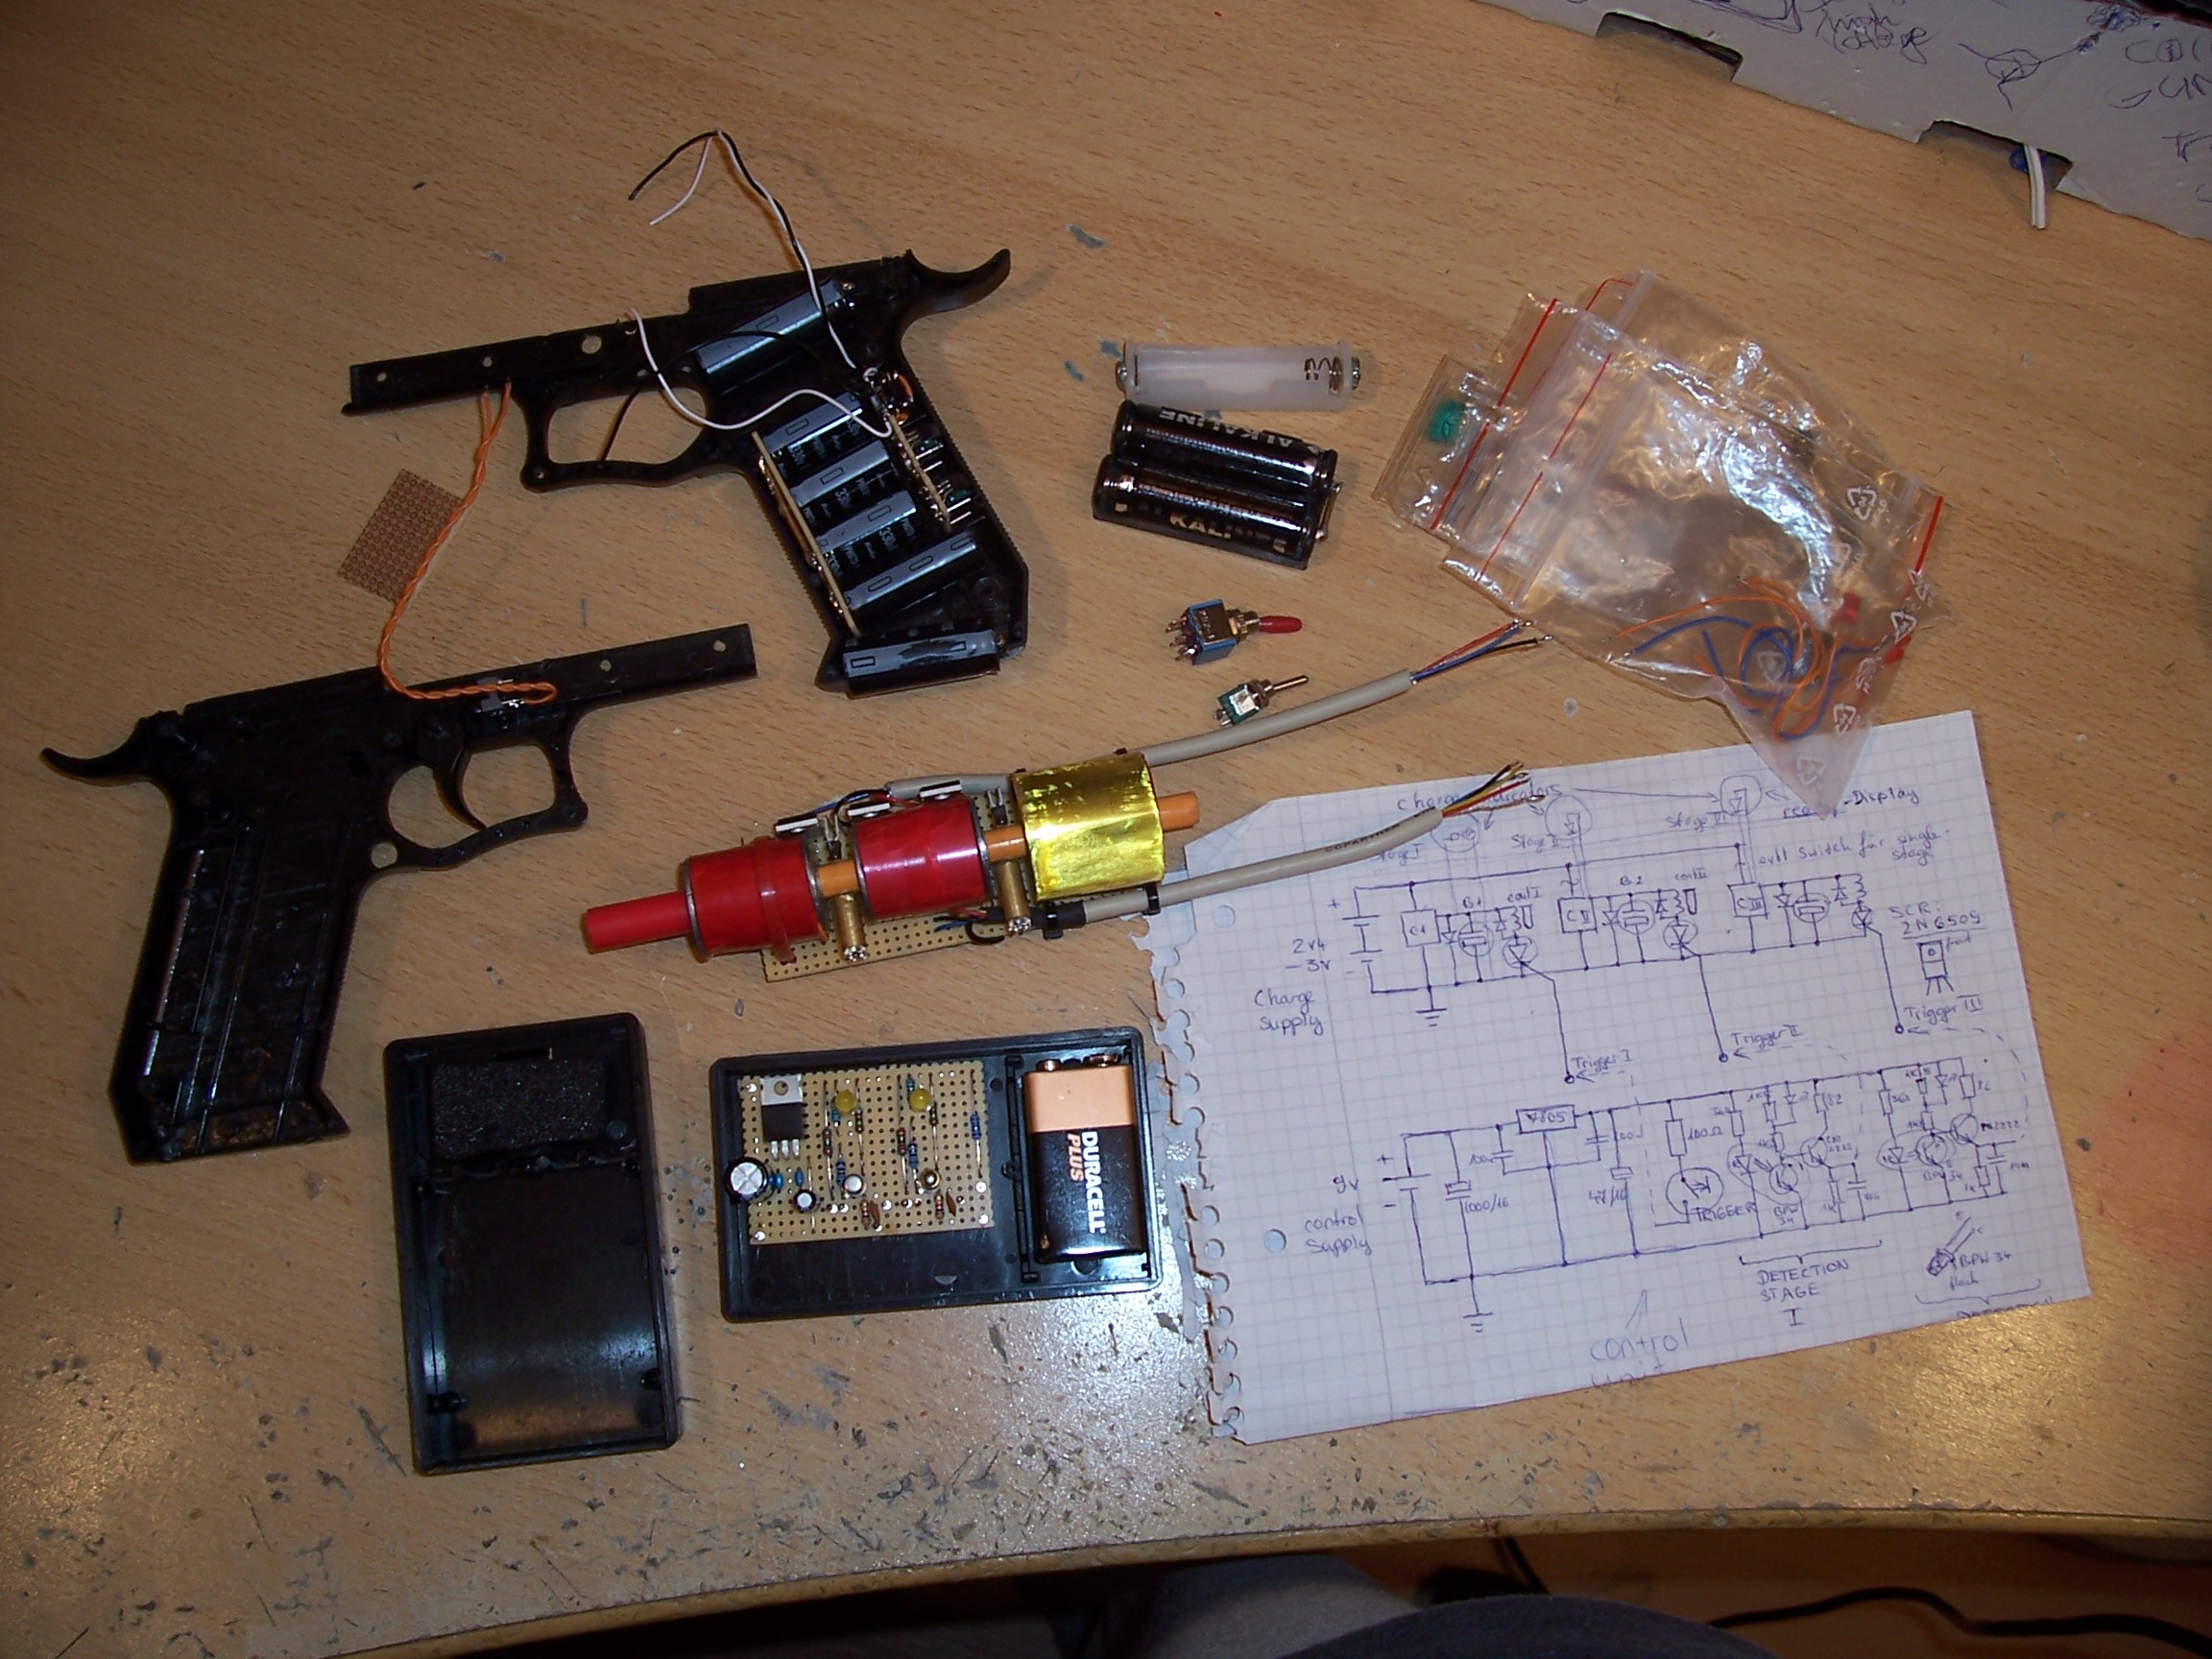
This photo contains pretty much all parts as well as the schematic diagram. You can see where most of the capacitors are going to live. The 4 caps in parallel are all for the first stage. Right above them you see the tiny charging circuits. I’ve extracted them from three disposable cameras and re-soldered the most important parts (only the tiny transformer, one resistor and the transistor as well as the diode) on a piece of perfboard. Each stage has got its own charging circuit. Stage 1 and 2 are Kodak-derived and stage 3 is Fujifilm-derived. It takes about 40s to charge the caps to about 330V, depending on the AA batteries you use.
The handpiece is from an old airsoft gun by the way. The trigger switch is also built in already (taken from an old computer).

A close-up to the charging circuitry with some more wiring accomplished. The LEDs and the neon bulb at the end of the wires are for charge detection. Kodak uses LEDs, Fujifilm those neon bulbs.

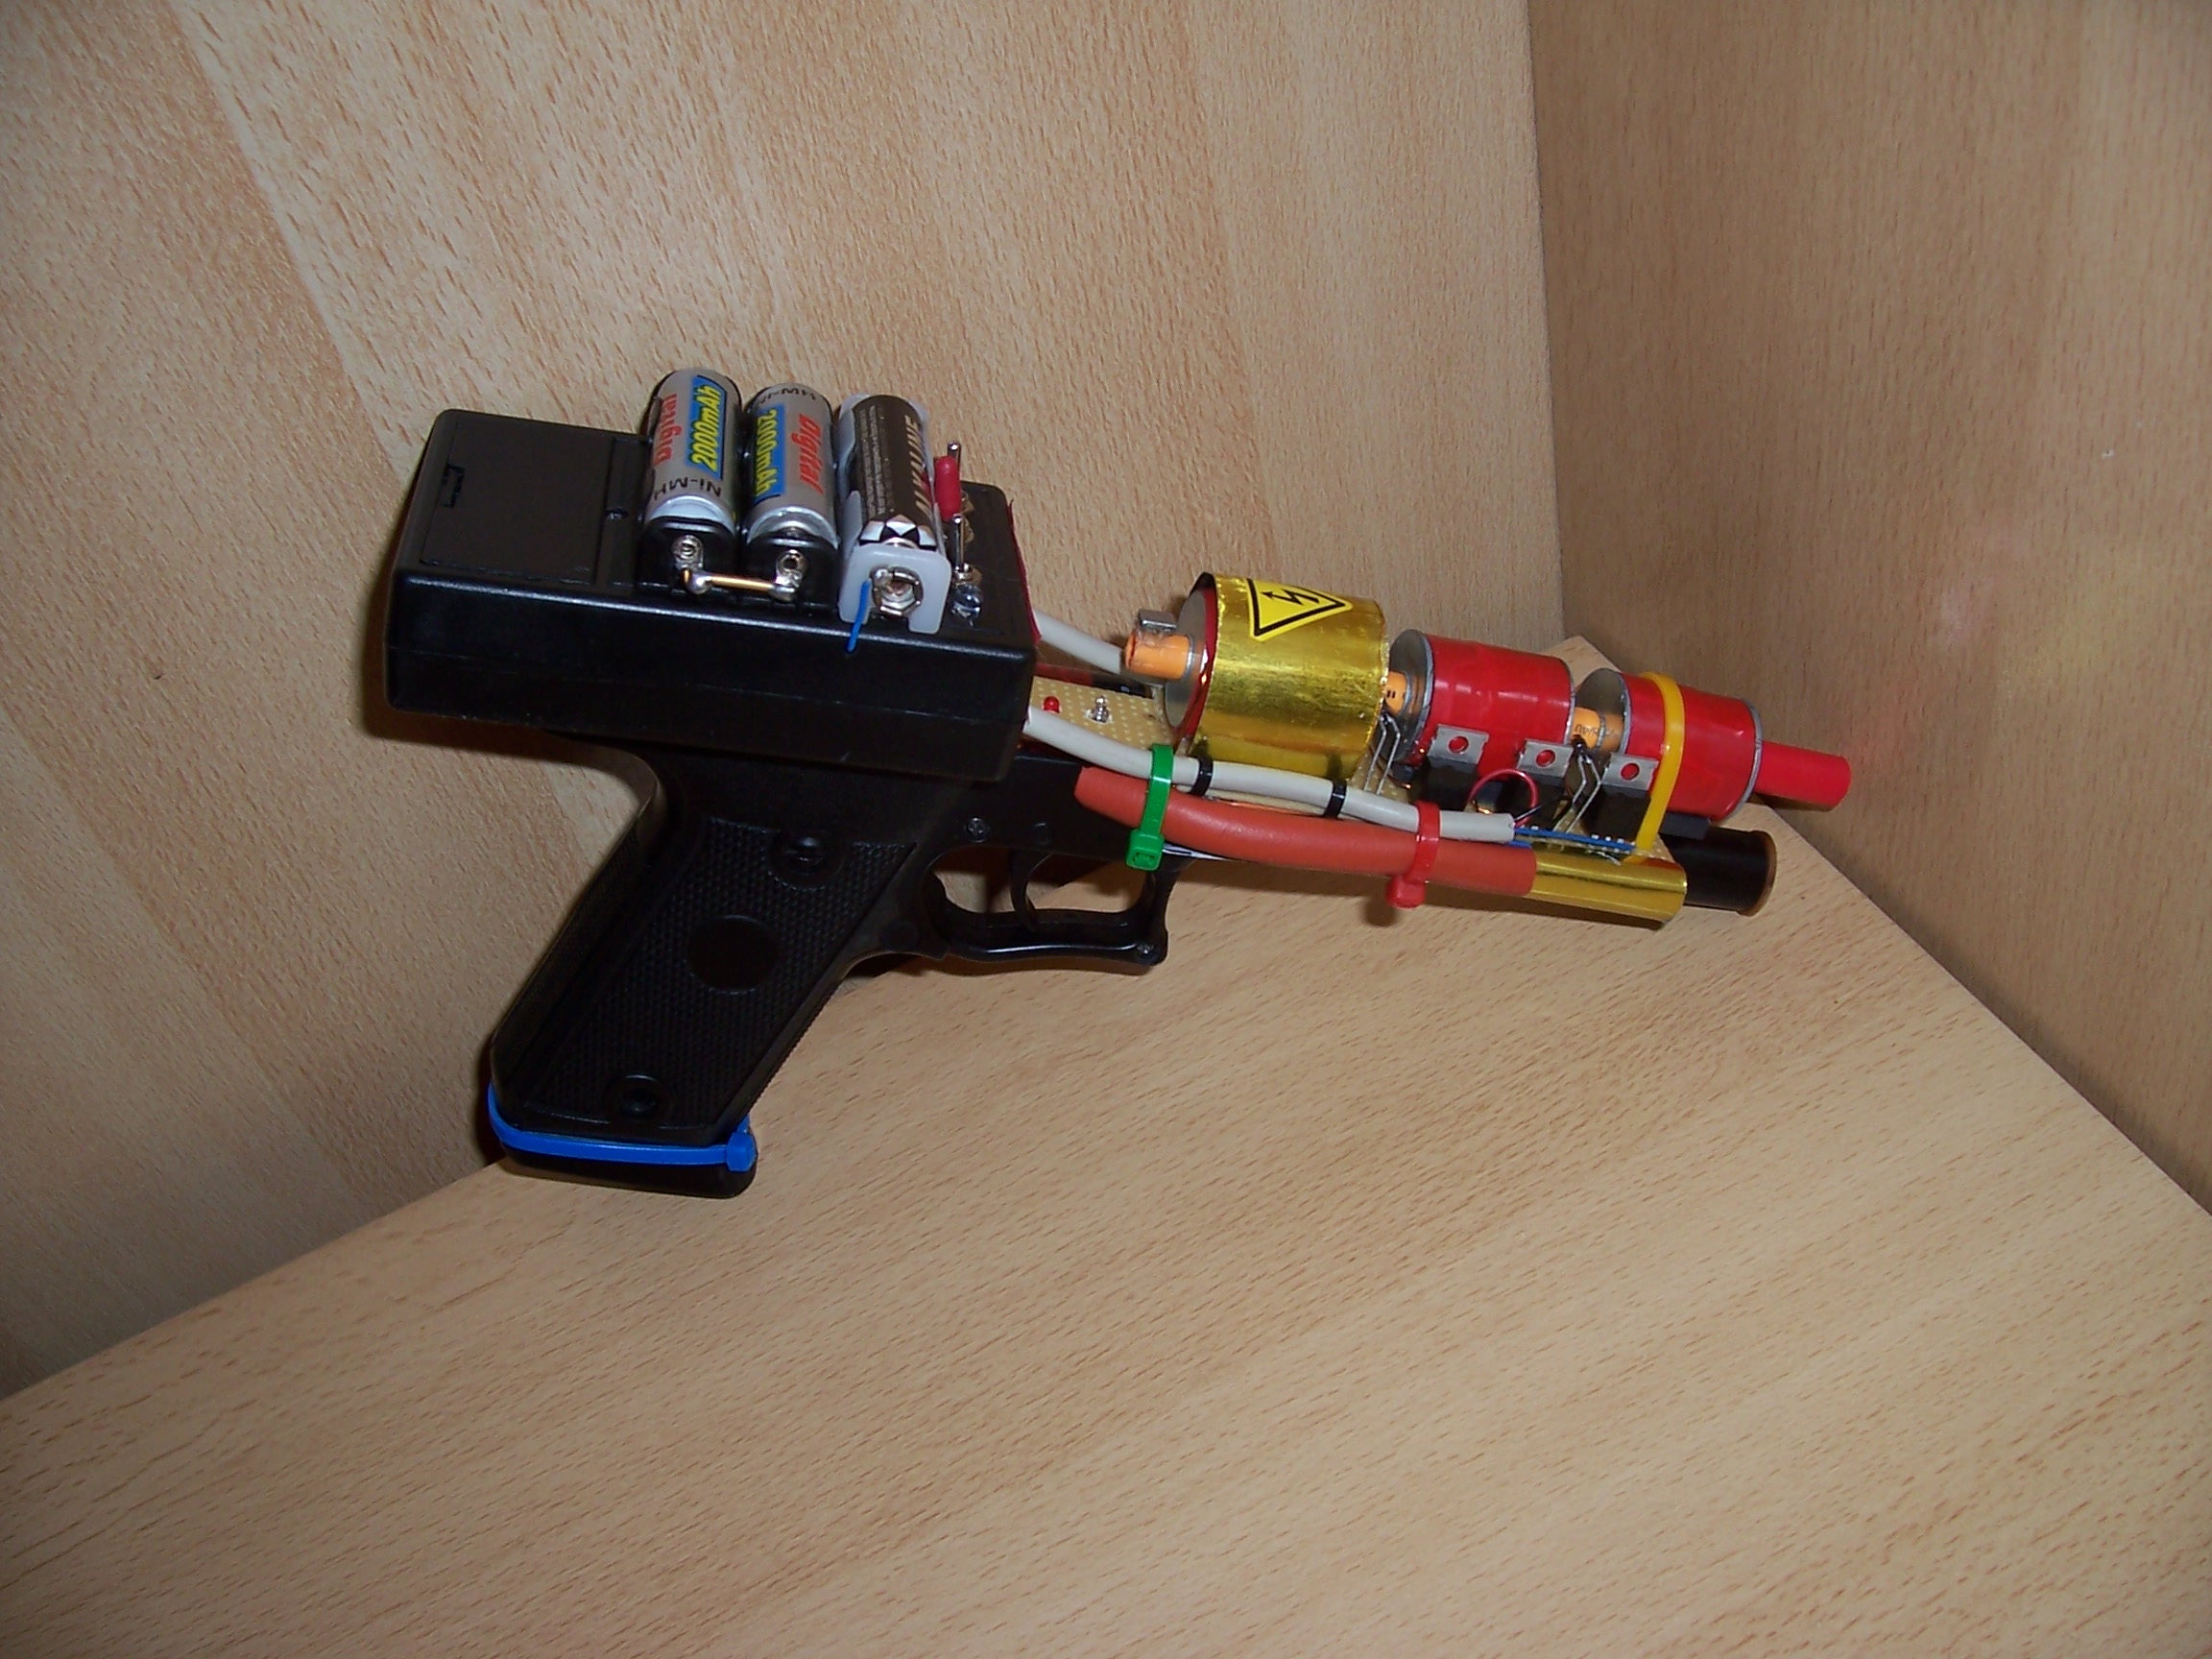
Tight, but it fits!
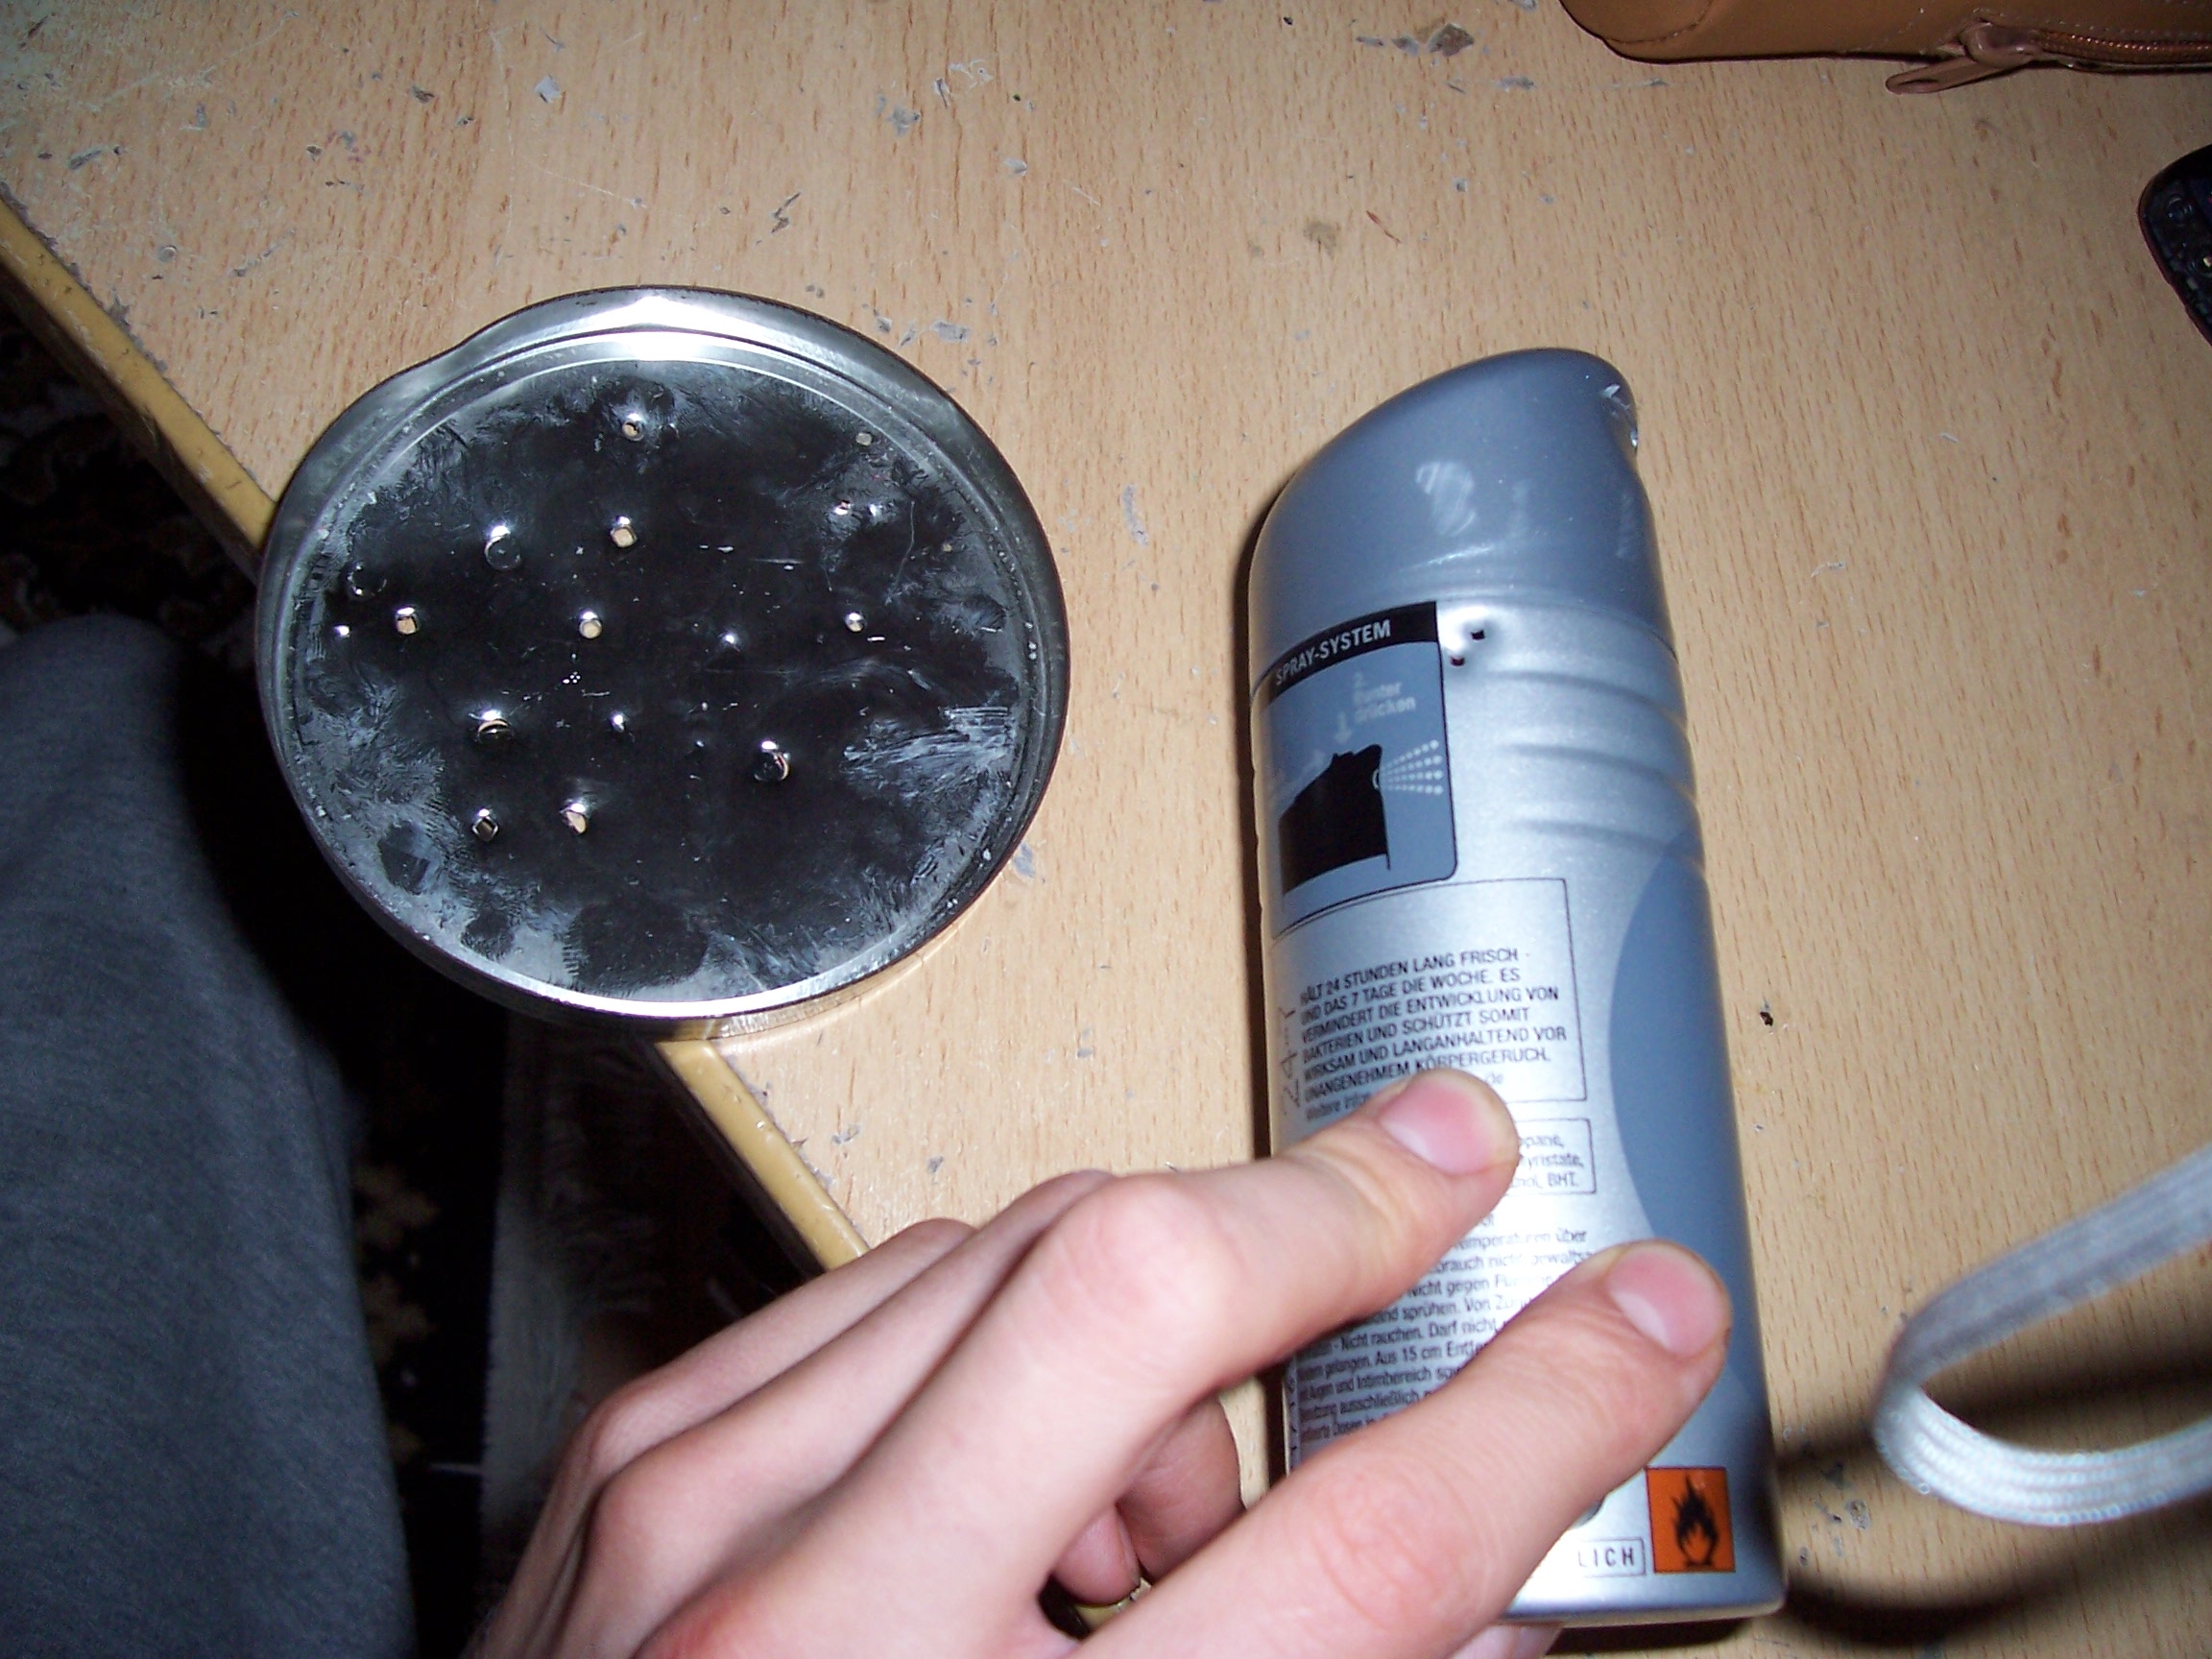
Some insulation was done, a red laser mounted and the bottom of the accelerator stage covered with aluminum sheets, which have been cut out of a spray can :).
A typical shot with a “stabilized” pointed projectile. You can see that it penetrates from larger distances.
Simply a big iron slug cal. 6mm.
An exact measurement of the muzzle velocity has to be done some day to determine efficiency, but it seems not bad at all. The thing even punches holes into tin.