
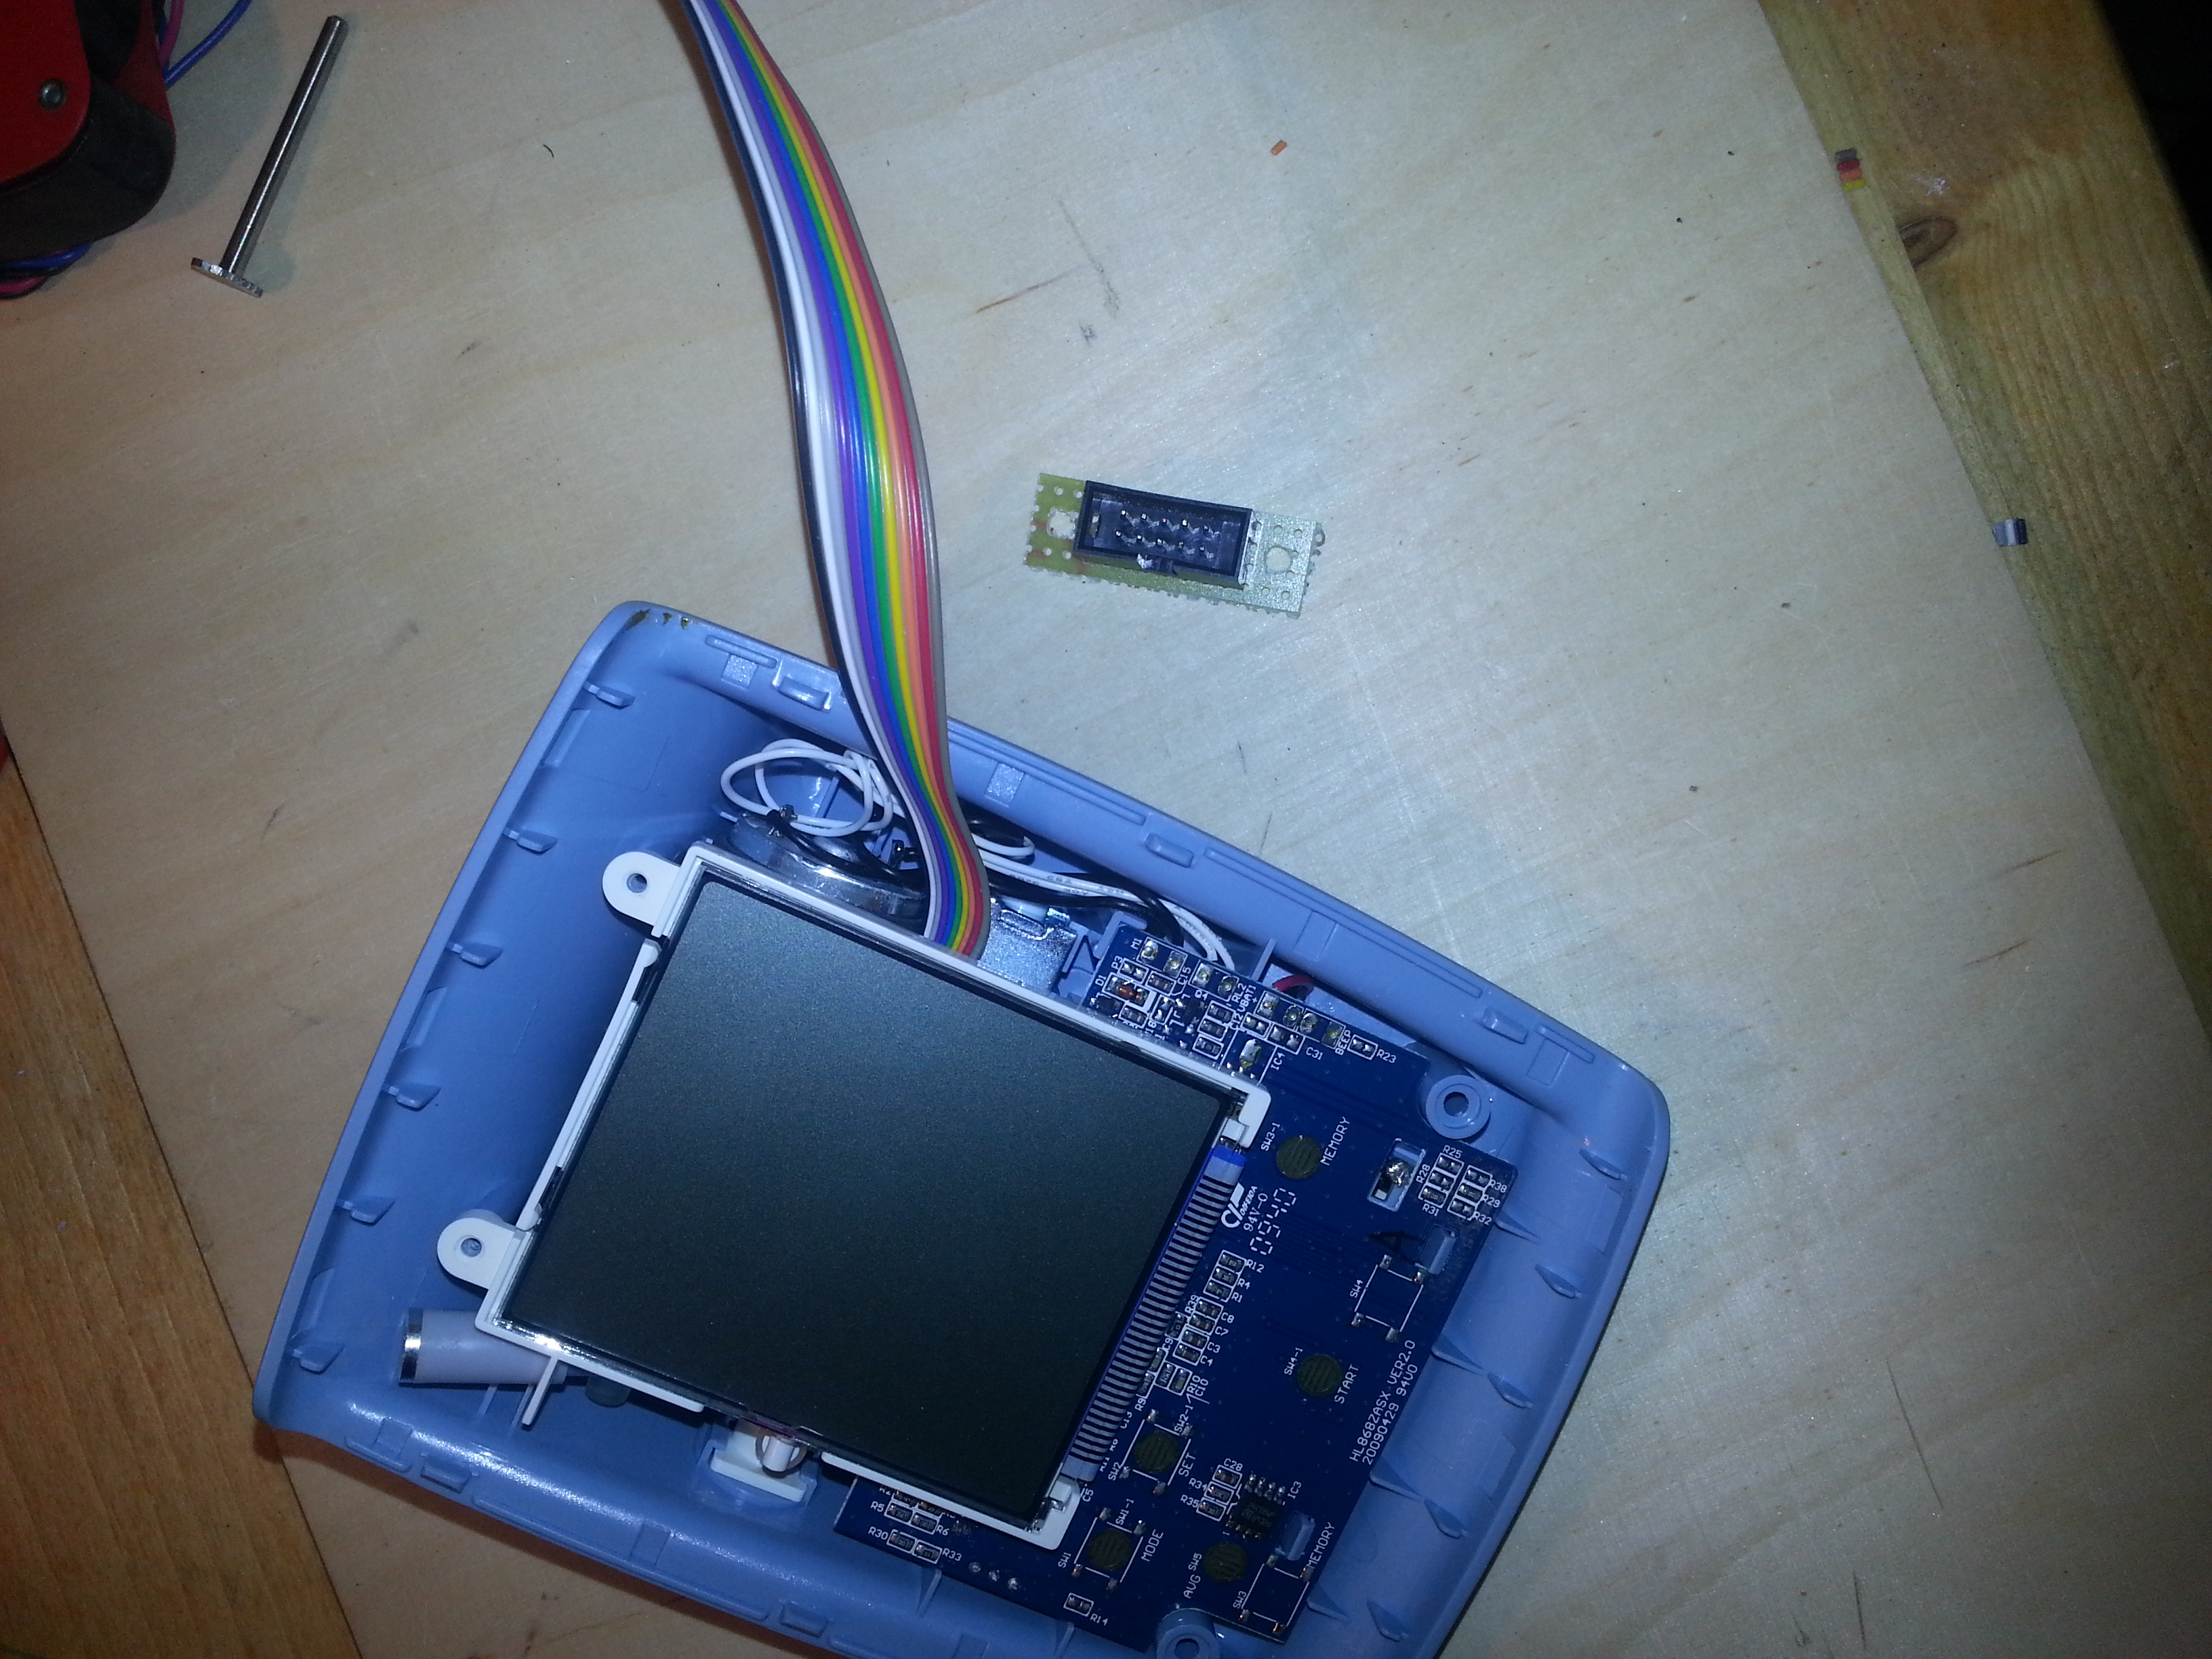
Blood pressure Monitor SBM30 (hl868ba) Arduino hack
In some of my internships in hospital, I was wondering if the Schellong Test could be performed automatically. In order to do that one would have to build a programmable blood pressure measuring device. But wait, can’t we just hack an existing one? I had an SBM30 lying around, which is technically the same as this device. this post by Joe Desbonnet covers the hacking of it. I continued his work. The goal was to make the device completely controllable through its handy testpoint interface. This is what I ended up with:


/**
SANITAS SBM30 / HL868BA / HL168Y blood pressure monitor hack


 * I2C bus snooper. Written to eavesdrop on MCU to EEPROM
 * communications in a HL168Y blood pressure monitor. SCL
 * is connected to Arduino pin 2 and SDA to pin 3 (UNO).
 * This version will decode read and write operations to
 * EEPROM outputting heart rate and blood pressure to the serial port

 * Adapted to ARDUINO UNO: PIND2: D2 -> SCL of EEPROM; PIND3: D3 -> SDA of EEPROM

 */

//watchdog timer include
#include <avr/wdt.h>

//////////////////////////////////////////////////////////////////////////////////////////////////////////////////
//pins to connect the the data and clock line to.
//PORTD 2 & 3 on the UNO: use digital pins 2 and 3
//digital pins 18 and 19 are PORTD 2 & 3 on the Arduino Mega, so you need to change Sclock to 18 and Sdata to 19
//any GPIO pins can be chosen, but the direct port manipulations in the takeMeasurement() function have to be changed!!
int Sclock = 2;
int Sdata = 3;

//the pin to drive the on/off/start button of the device
int startPin = 12; //attach pin 12 to the field of the start button or the according test point!
int buttonPin = 4; //attach a pushbutton from pin 4 to GND, pressing it will start the measurement and print values to serial monitor (11200 baud)

//////////////////////////////////////////////////////////////////////////////////////////////////////////////////


char hexval[16] = {'0', '1', '2', '3', '4', '5', '6', '7', '8', '9', 'A', 'B', 'C', 'D', 'E', 'F'};

#define LOG_SIZE 255
unsigned char datalog[LOG_SIZE];
unsigned char logptr;
//stores the amount of etracted R aaa vv\n lines after each blood pressure measurement
unsigned char bytesOfData = 0;
boolean measuring_now = false;
boolean measuring_failed = false;

//bytes to store the final and most important values
unsigned char heart_rate = 0;
unsigned char diast_press = 0;
unsigned char syst_press = 0;

unsigned char diast_press_hunderter = 0;
unsigned char diast_press_zehner = 0;
unsigned char syst_press_hunderter = 0;
unsigned char syst_press_zehner = 0;


//******************************************************************************************************************************************
//                                                  SETUP and LOOP
//******************************************************************************************************************************************

void setup()   {
  pinMode(Sclock, INPUT);
  pinMode(Sdata, INPUT);
  pinMode(startPin, OUTPUT);
  pinMode(buttonPin, INPUT);
  digitalWrite(startPin, HIGH);  //HIGH = not pressed
  digitalWrite(buttonPin, HIGH);
  Serial.begin(115200);

}

void loop()
{

    if (digitalRead(buttonPin)==LOW)  // Button pressed
    {
      //send signal to BPM
      startButtonActivate();
      //set flag that measurment is running
      //used for breaking out of the waiting loops in the takeMeasurement() function
      measuring_now = true;

      takeMeasurement();
    }


  //wdt_reset();

}
//******************************************************************************************************************************************
//                                                  FUNCTION DEFINITIONS
//******************************************************************************************************************************************

//Algorithm to passively sniff into the MCU-EEPROM i2c communication of the SBM-30 blood pressure monitor
//based on the code by Joe Desbonnet ( http://jdesbonnet.blogspot.de/2010/05/using-arduino-as-simple-logic-analyzer.html )
void takeMeasurement(){

  unsigned char s, b, byteCounter, bitCounter, rwFlag;
  unsigned char addr_hi, addr_lo;
  unsigned int t = 0;

  logptr = 0;

  waitForStart:


   // Expect both SLC and SDA to be high
  while ( (PIND & 0b00001100) != 0b00001100) {

    }
  // both SLC and SDA high at this point

  // Looking for START condition. Ie SDA transitioning from
  // high to low while SLC is high.
  while ( (PIND & 0b00001100) != 0b00000100) {
    //break out of an infinite loop after a measurement! HERE!
    if(measuring_now == false)
      return;


    if ( (--t == 0) &&  (logptr > 0) ) {
        writeData();
    }
  }

  firstBit:


  byteCounter = 0;
  bitCounter = 0;

  nextBit:

  // If SCL high, wait for SCL low
  while ( (PIND & 0b00000100) != 0) {

    }

  // Wait for SCL to transition high. Nothing of interest happens when SCL is low.
  while ( (PIND & 0b00000100) == 0) {

    }

  // Sample SDA at the SCL low->high transition point. Don't know yet if this is a
  // data bit or a STOP or START condition.
  s = PIND & 0b00001000;

  // Wait for SCL to transition low while monitoring SDA for a transition.
  // No transition means we have data or ACK bit (sample in 's'). A hight to
  // low SDA = START, a low to high SDA transition = STOP.
  if (s == 0) {
    // loop while SCL high and SDA low
    while ( (PIND & 0b00001100) == 0b00000100) {

    }
    if ( (PIND & 0b00001100) == 0b00001100) {
         // STOP condition detected
         if (logptr > LOG_SIZE - 20) {

           writeData();
         }
         goto waitForStart;
    }
  } else {
    // loop while SCL high and SDA high
    while ( (PIND & 0b00001100) == 0b00001100) {

    }
    if ( (PIND & 0b00001100) == 0b00000100) {
        // START condition.
        goto firstBit;
    }
  }

  // OK. This is a data bit.
  bitCounter++;

  if (bitCounter < 9) {
    b <<= 1;
    // if data bit is '1' set it in LSB position (will default to 0 after the shift op)
    if (s != 0) {
      b |= 0b00000001;
    }

    goto nextBit;
  }

  // 9th bit (ack/noack)

  bitCounter = 0;
  byteCounter++;

  switch (byteCounter) {
    case 1: // 1010AAAW where AAA upper 3 bits of address, W = 0 for writer, 1 for read
    if ( (b & 0b11110000) != 0b10100000) {
      goto waitForStart;
    }
    // Set A9,A8 bits of address
    addr_hi = (b>>1) & 0b00000011;
    rwFlag = b & 0b00000001;
    break;

    case 2: // data if rwFlag==1 else lower 8 bits of address
    if (rwFlag == 1) {
      // data read from eeprom. Expect this to be the last byte before P
      //datalog[logptr++] = ' ';
      datalog[logptr++] = 'R';
      datalog[logptr++] = ' ';
      datalog[logptr++] = hexval[addr_hi];
      datalog[logptr++] = hexval[addr_lo>>4];
      datalog[logptr++] = hexval[addr_lo & 0b00001111];
      datalog[logptr++] = ' ';
      datalog[logptr++] = hexval[b >> 4];
      datalog[logptr++] = hexval[b & 0b00001111];
      datalog[logptr++] = '\n';
    } else {
      addr_lo = b;
    }
    break;

    case 3: // only have 3rd byte if rwFlag==0. This will be the data.
    if (rwFlag == 0) {
      //datalog[logptr++] = ' ';
      datalog[logptr++] = 'W';
      datalog[logptr++] = ' ';
      datalog[logptr++] = hexval[addr_hi];
      datalog[logptr++] = hexval[addr_lo>>4];
      datalog[logptr++] = hexval[addr_lo & 0b00001111];
      datalog[logptr++] = ' ';
      datalog[logptr++] = hexval[b>>4];
      datalog[logptr++] = hexval[b & 0b00001111];
      datalog[logptr++] = '\n';

      if (logptr > LOG_SIZE - 10) {
        writeData();
      }

      break;
    }

  } // end switch

  goto nextBit;
}

//******************************************************************************************************************************************

//start working with the lines (= "important data bytes") that are written to the EEPROM after a measurement was taken!
void writeData () {
  //we only need the data that is "written" , in particular the heart rate and blood pressure, which are two chars that encode hex numbers
  if(datalog[0]=='W'){
     //sometimes two lines are extracted at once, here the data extraction is done and the calculateValues function is called with the values
      if(logptr > 10){
        calculateValues(datalog[6], datalog[7]);
        bytesOfData++;

        calculateValues(datalog[15], datalog[16]);
        bytesOfData++;
      } else {
        //when only one line (= "important data byte") is extracted from the eeprom write procedure after the measurement
        calculateValues(datalog[6], datalog[7]);
        bytesOfData++;
      }

    }

   measuring_failed = false; //if that comes after
   //device reads from eeprom when you start measuring, so reset the counter for the most important "data bytes"
   if(datalog[0]=='R'){
     bytesOfData = 0;
   }else if(bytesOfData > 9){
     bytesOfData = 0;
     writeToSerial();
   }/*else if(bytesOfData >= 8){  //this means that a measurement has failed
     wdt_enable(WDTO_4S);                //WATCHDOG!! if no data is written to the screen, because only 9 bytes are extracted (sometimes fucking happens)
     measuring_failed = true;
   }*/

  //clear datalog[] and logptr
  for (int i = 0; i < logptr; i++) {
    //Serial.write(datalog[i]); //use Serial.write() to send BYTES!!!!!!!!!
    datalog[i] = 0;
  }
  //Serial.println(logptr);
  logptr=0;
  //Serial.write('\n');
}

//******************************************************************************************************************************************

//make hex numbers out of ASCII characters
byte getVal(char c)
{
 if(c >= '0' && c <= '9')
   return (byte)(c - '0');
 else
   return (byte)(c-'A'+10);
}
//******************************************************************************************************************************************

//LCD display function, prints out the new values
//gets called at the very end of the measurement and data acquisition process
void writeToSerial(){


  Serial.print("heart rate: ");
  Serial.println(heart_rate);

  Serial.print("pressure: ");
  Serial.print(syst_press);
  Serial.print("/");
  Serial.println(diast_press);
  //once written, you can continue doing other stuff

  measuring_now = false;

}

//******************************************************************************************************************************************

//calculates HR from HEX number and decodes the syst. and diast. blood pressure values from line 5-7
void calculateValues(char char6, char char7){
  if( bytesOfData == 9){
    //calculate the pressures
    syst_press = syst_press_hunderter + syst_press_zehner;
    diast_press = diast_press_hunderter + diast_press_zehner;

  }
  if( bytesOfData == 8){
    //heart rate is encoded in two hex chars
    //make a byte out of two nibbles
    heart_rate = getVal(char7) + (getVal(char6) << 4);

  }
  //diastolic value last two digits
  if( bytesOfData == 7){
    diast_press_zehner = (char6 - '0') * 10 +  (char7 - '0');
  }
  //systolic value last two digits
  if( bytesOfData == 6){
    syst_press_zehner = (char6 - '0') * 10 +  (char7 - '0');
  }
  //diastolic and systolic value first digit
  if( bytesOfData == 5){
    diast_press_hunderter = (char7 - '0') * 100;
    syst_press_hunderter = (char6 - '0') * 100;
  }

}

//******************************************************************************************************************************************

//Sequence of pulling the test point of the SBM-30 low twice to turn on and/or make the device start measuring

void startButtonActivate(){
    digitalWrite(startPin, LOW);
    delay(100);
    digitalWrite(startPin, HIGH);
    delay(400);
    digitalWrite(startPin, LOW);
    delay(100);
    digitalWrite(startPin, HIGH);
}
Hey Kauz,
Thanks for this post, I really like that project.
I nearly understand everything of the code, but I’m really new in thinkering.
Therefore, I would appreciate if you could tell me the necessary steps to connect the SBM30 with the arduino.
Thanks,
Markus
Hey Markus,
the connection details are described here: http://jdesbonnet.blogspot.de/2011/01/sanitas-smb30-aka-hl868ba-teardown.html
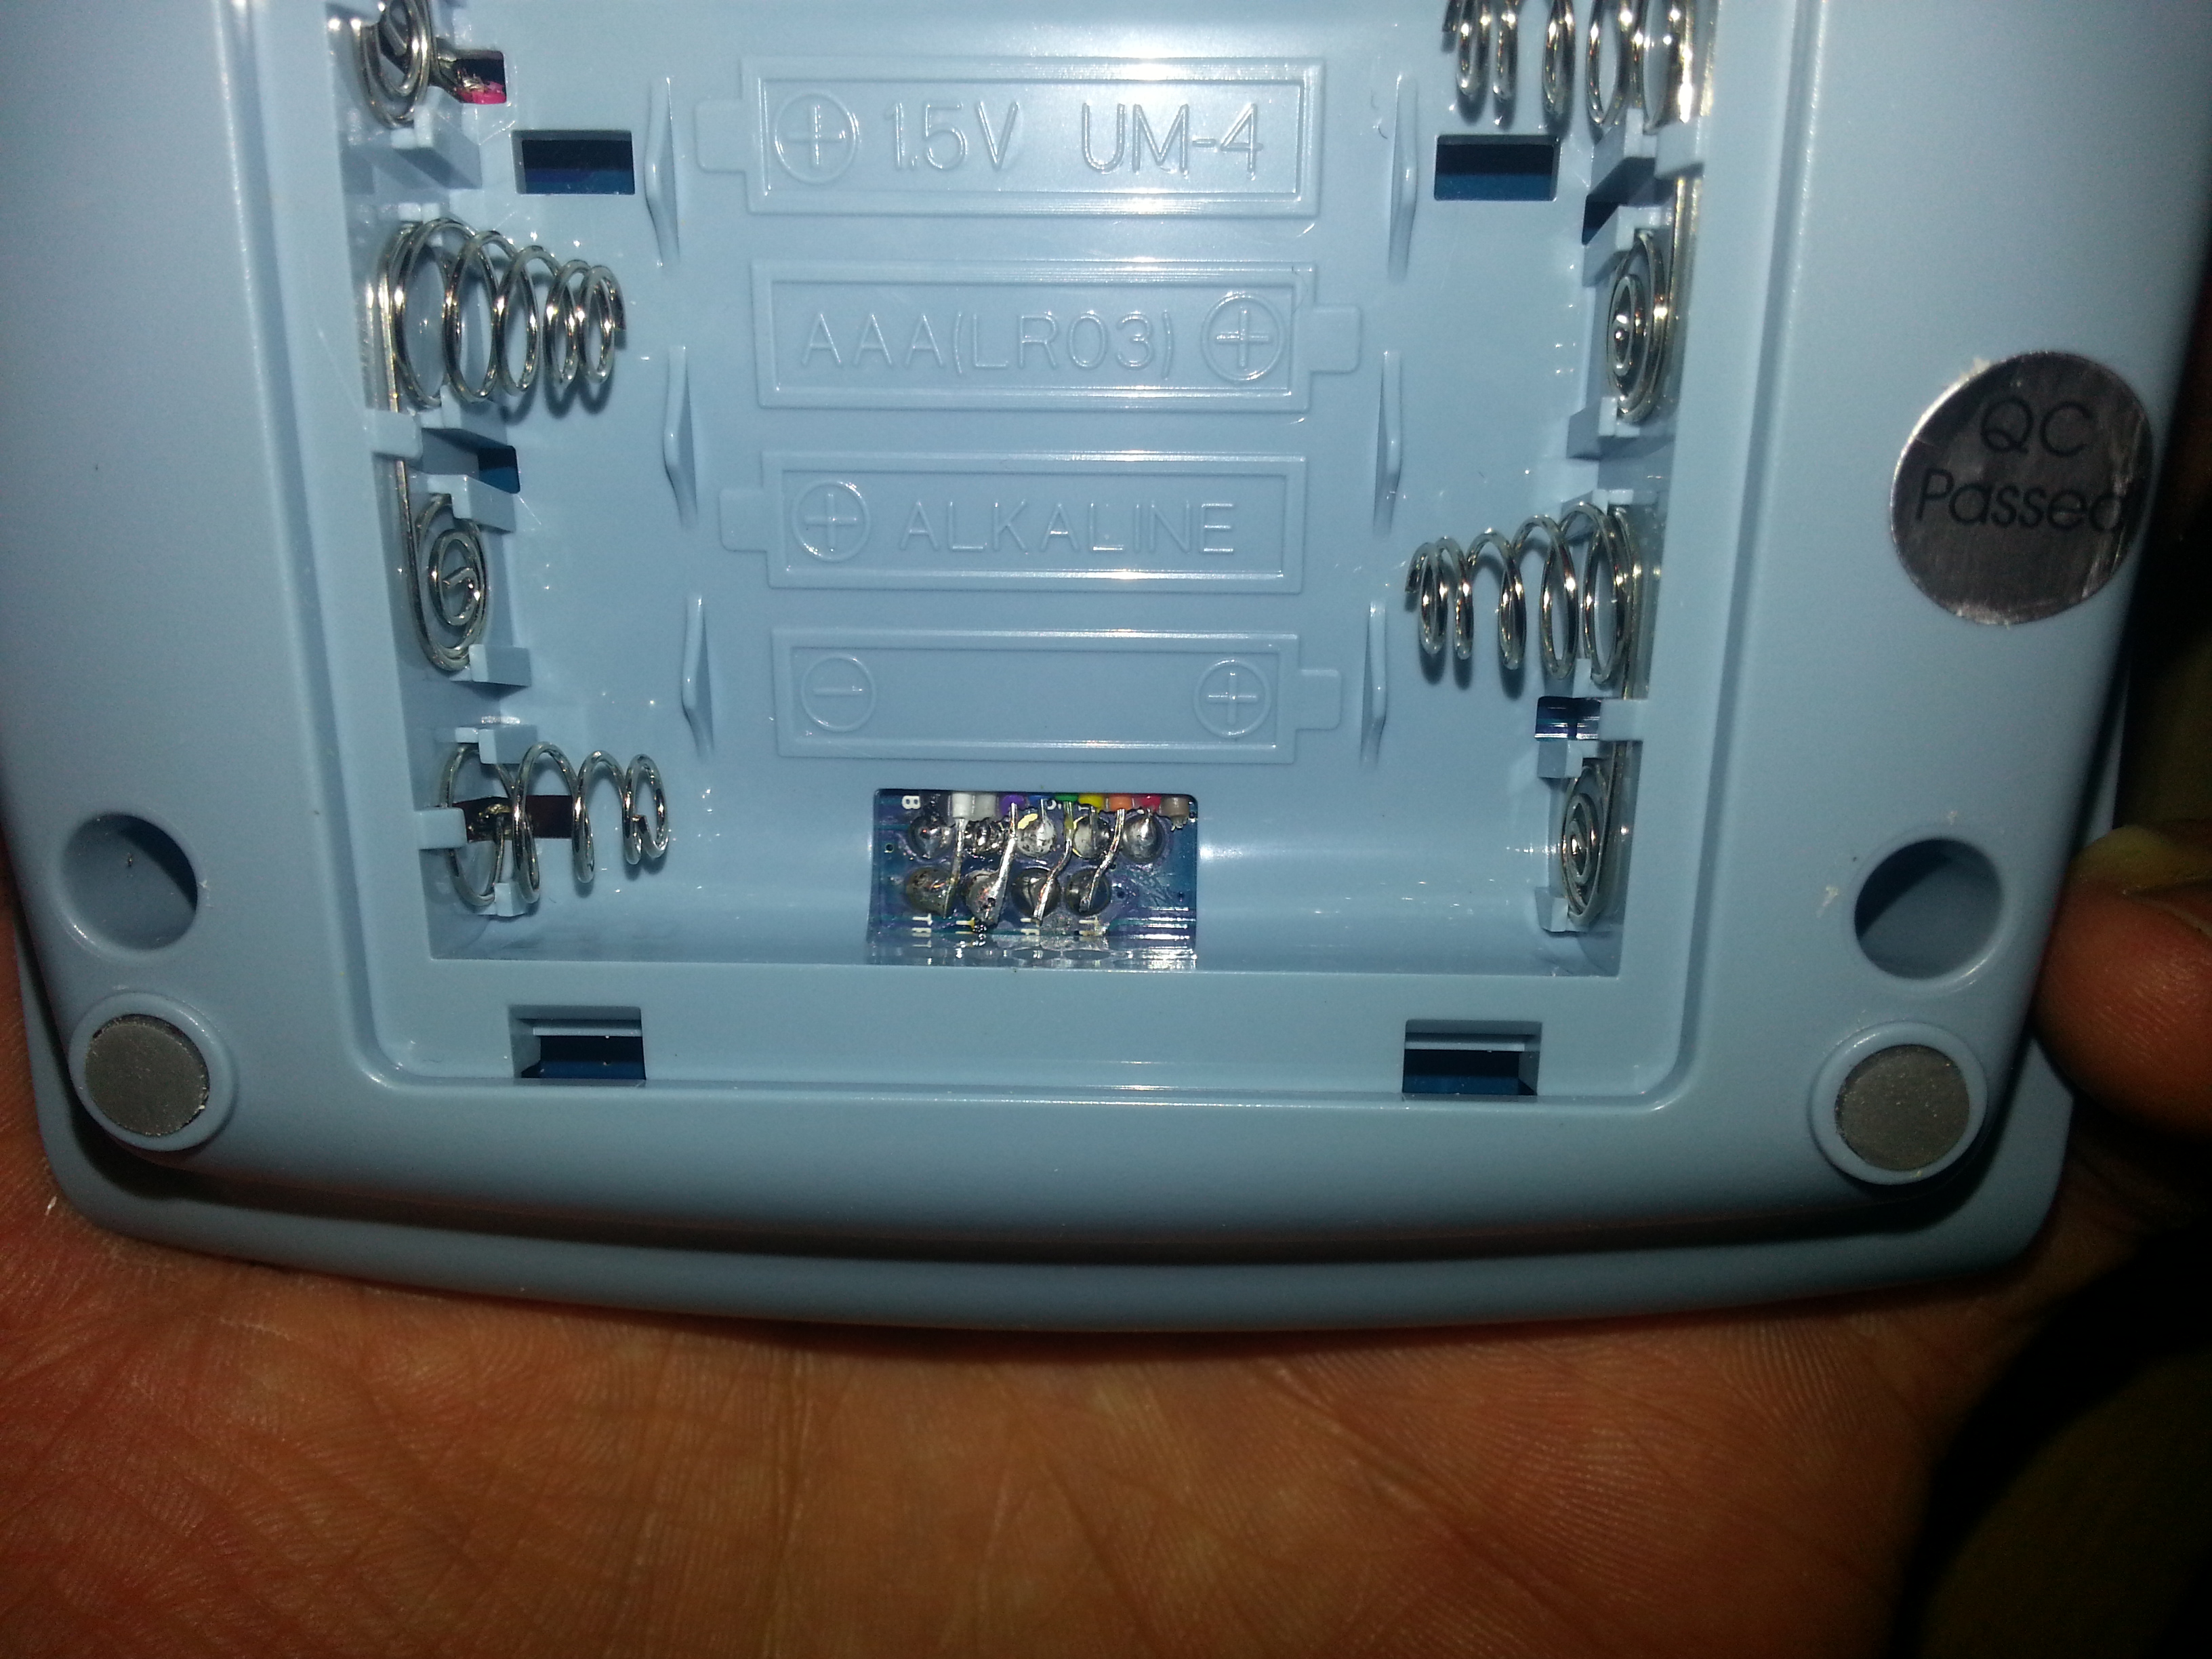
Lines 23-28 in the code above tell you which pins of the Arduino Uno connect to which test points of the SBM30. Don’t forget to connect Arduino ground to SBM30 ground and you should get the setup up and running.
I hope this helps.
Arthur
Hi,
My grandma’s family clinic told us to monitor her blood pressure monitor. The thing is we don’t stay with her and she is illiterate.
This whole thing sort of spark my internal geek to build an arduino blood pressure monitor that sends her data to a website whereby I can monitor or send this info to the clinic. I thought of making an arduino blood pressure monitor that connects to the internet freely.
I chanced upon this site while discovering what is in the market in term of sensors and stuff
May I know what are the parts you used beside the blood pressure monitor and the arduino mega?
besides the Arduino and the hacked blood pressure monitor there are no really essential parts. It depends on what you want to do with the data…
Hey man! Thanks for your code.
I have tried something similar without the use of the button (meaning just connecting the clock and data) so have altered the code a little bit. For some reason serial spits out the results rarely. I cannot figure out why it works sometimes and takes a pile of attempts to get it to print out the result again.
Have you any advice? Is there a way to reset the monitor or does your system just work everytime?
Cheers!
Hey, I haven’t worked on this project for a while and I remember that there were indeed issues with the code similar to what you are describing. I think you have to toggle the Start button one more time in the code somewhere to have a more reliable control routine… I’ll publish it as soon as I’ve figured it out. This hack is meant to be used as a blood pressure logger in DIY polysomnography some time soon.
i really like you post about the ABPM project. i am doing similar project for my university course.
my aim is to take off-shelf blood pressure monitor, hack it to it and get the reading in to arduino, then i am going to send this reading to web server using wifi module cc3000
then i am going to develop iPhone app to get the reading from the web server.
i just bought SBM21,but i could not find the test point as clear as in your post about SBM30. there are some test points scattered across the PCB like, RXD,TXD,GND,VCC,VDD,REST,FLDMO.
i have connected the RXD and TXD to arduino mega pins 18 & 19, and connected arduino GND to GND, and 3.3v to VCC. then i have uploaded your code from your post in to my ardino mega, but i could not see any data in the serial monitor.
i really new to micrcovntorller stuff. i play around it for long time, i could not get it to work. i am really stuck in this and i need to get it work for my project.
kindly could you please advice how can i get SBM21 blood pressure reading to arduino .
thank you very much for your cooperation.
Hey,
well I haven’t experimented with the SBM21. Its internals could be quite different. I hope that at least the communication between the microcontroller of the blood pressure monitor and the EEPROM work as in the SBM30. You could try to locate the SDA and SCL pins on the on-board EEPROM (look which one it is, google it, and look into the datasheet to locate those pins. The communication protocol is I2C.
Looks like RXD and TXD are UART test points. What you could also try is hook up a cheap logic analyzer to them and look what kind of data you get and at what baud rate. if this thing talks UART, it should be breeze to connect it to the Arduino. (But you will have to connect it to the Arduino’s serial port pins and use completely different code, since this code here only sniffs into I2C communication!)
If you don’t have a logic analyzer you could hook up an FTDI cable to TXD and RXD and try different baud rates to see if you can get some data into a terminal program prior to hooking up microcontrollers and code around.
I hope I could help.
Thanks for your support.
i connect TXD to oscilloscope it has continues clock 250 hz, while the RXD always reads hight about 4 volts. is this I2C or UART.
thanks
I would heavily suspect that it’s UART. So far things seem consistent: signal on TxD and no signal on RxD. It would be misleading to label the pins “TXD and RXD” if it was I2C. Time to hook up the FTDI chip and try different baud rates I’d say 😉
Has anyone set up the connections between SBM 30 and Arduino? I couldn’t do it yet
Where do you managed to find a SMB30? I could not find it online at all ..
I had trouble finding these, but luckily there once was an ebay auction where a second hand one was sold. I’d probably look for the original HL168Y since this is the one that is FDA-approved.
FYI
http://www.seagull-healthcare.dk/images/pdf/HL868BA_CE_090424.pdf
FYI
http://www.medicalexpo.it/prod/health-life/tensiometro-elettronico-automatico-braccio-68712-552753.html
I have a different Blood Pressure Monitor. Can i hack it as the same as you did with yours this way ? Or should i buy the same Blood Pressure ?
Its a great work btw !
Will tapping into the SCL and SDA port of the eeprom will do the trick of getting the required readings? (With the necessary code of course?)
Sure, this is being done here…
Can I use NodeMCU instead of Arduino UNO?
Can i use NodeMCU instead of Arduino UNO ?