Simple ways to start developing on ARM Cortex Microcontrollers
Out of curiosity and because ARM-based MCUs are becoming cheaper and even less power-consuming than AVR chips while offering way more processing power, I have considered to give it a trial.
Inspired by projects like anykey or the awesome code bases by microbuilder I’ve decided to choose NXP chips.
The LPC1343 (Cortex M3) is the main chip I’m working with at the moment, since the microbuilder code base is really versatile. An affordable small board called the Quick Start Board is available from Embedded Artist, which makes it easy to program that chip via different interfaces. A very interesting one is the USB bootloader, which makes the device appear as a mass storage device and enables you to simply drag in the firmware without the need for an external programmer. The Quick Start Board also has a 10 pin jtag connector, which can be connected to the LPC-Link, a jtag debugger that is integrated into the LPCxpresso boards. Some other things that are on board are a i2c EEPROM (LPC1343 lacks EEPROM), a 5V->3V3 regulator, bootloader and reset button and an LED on PIO0_7.
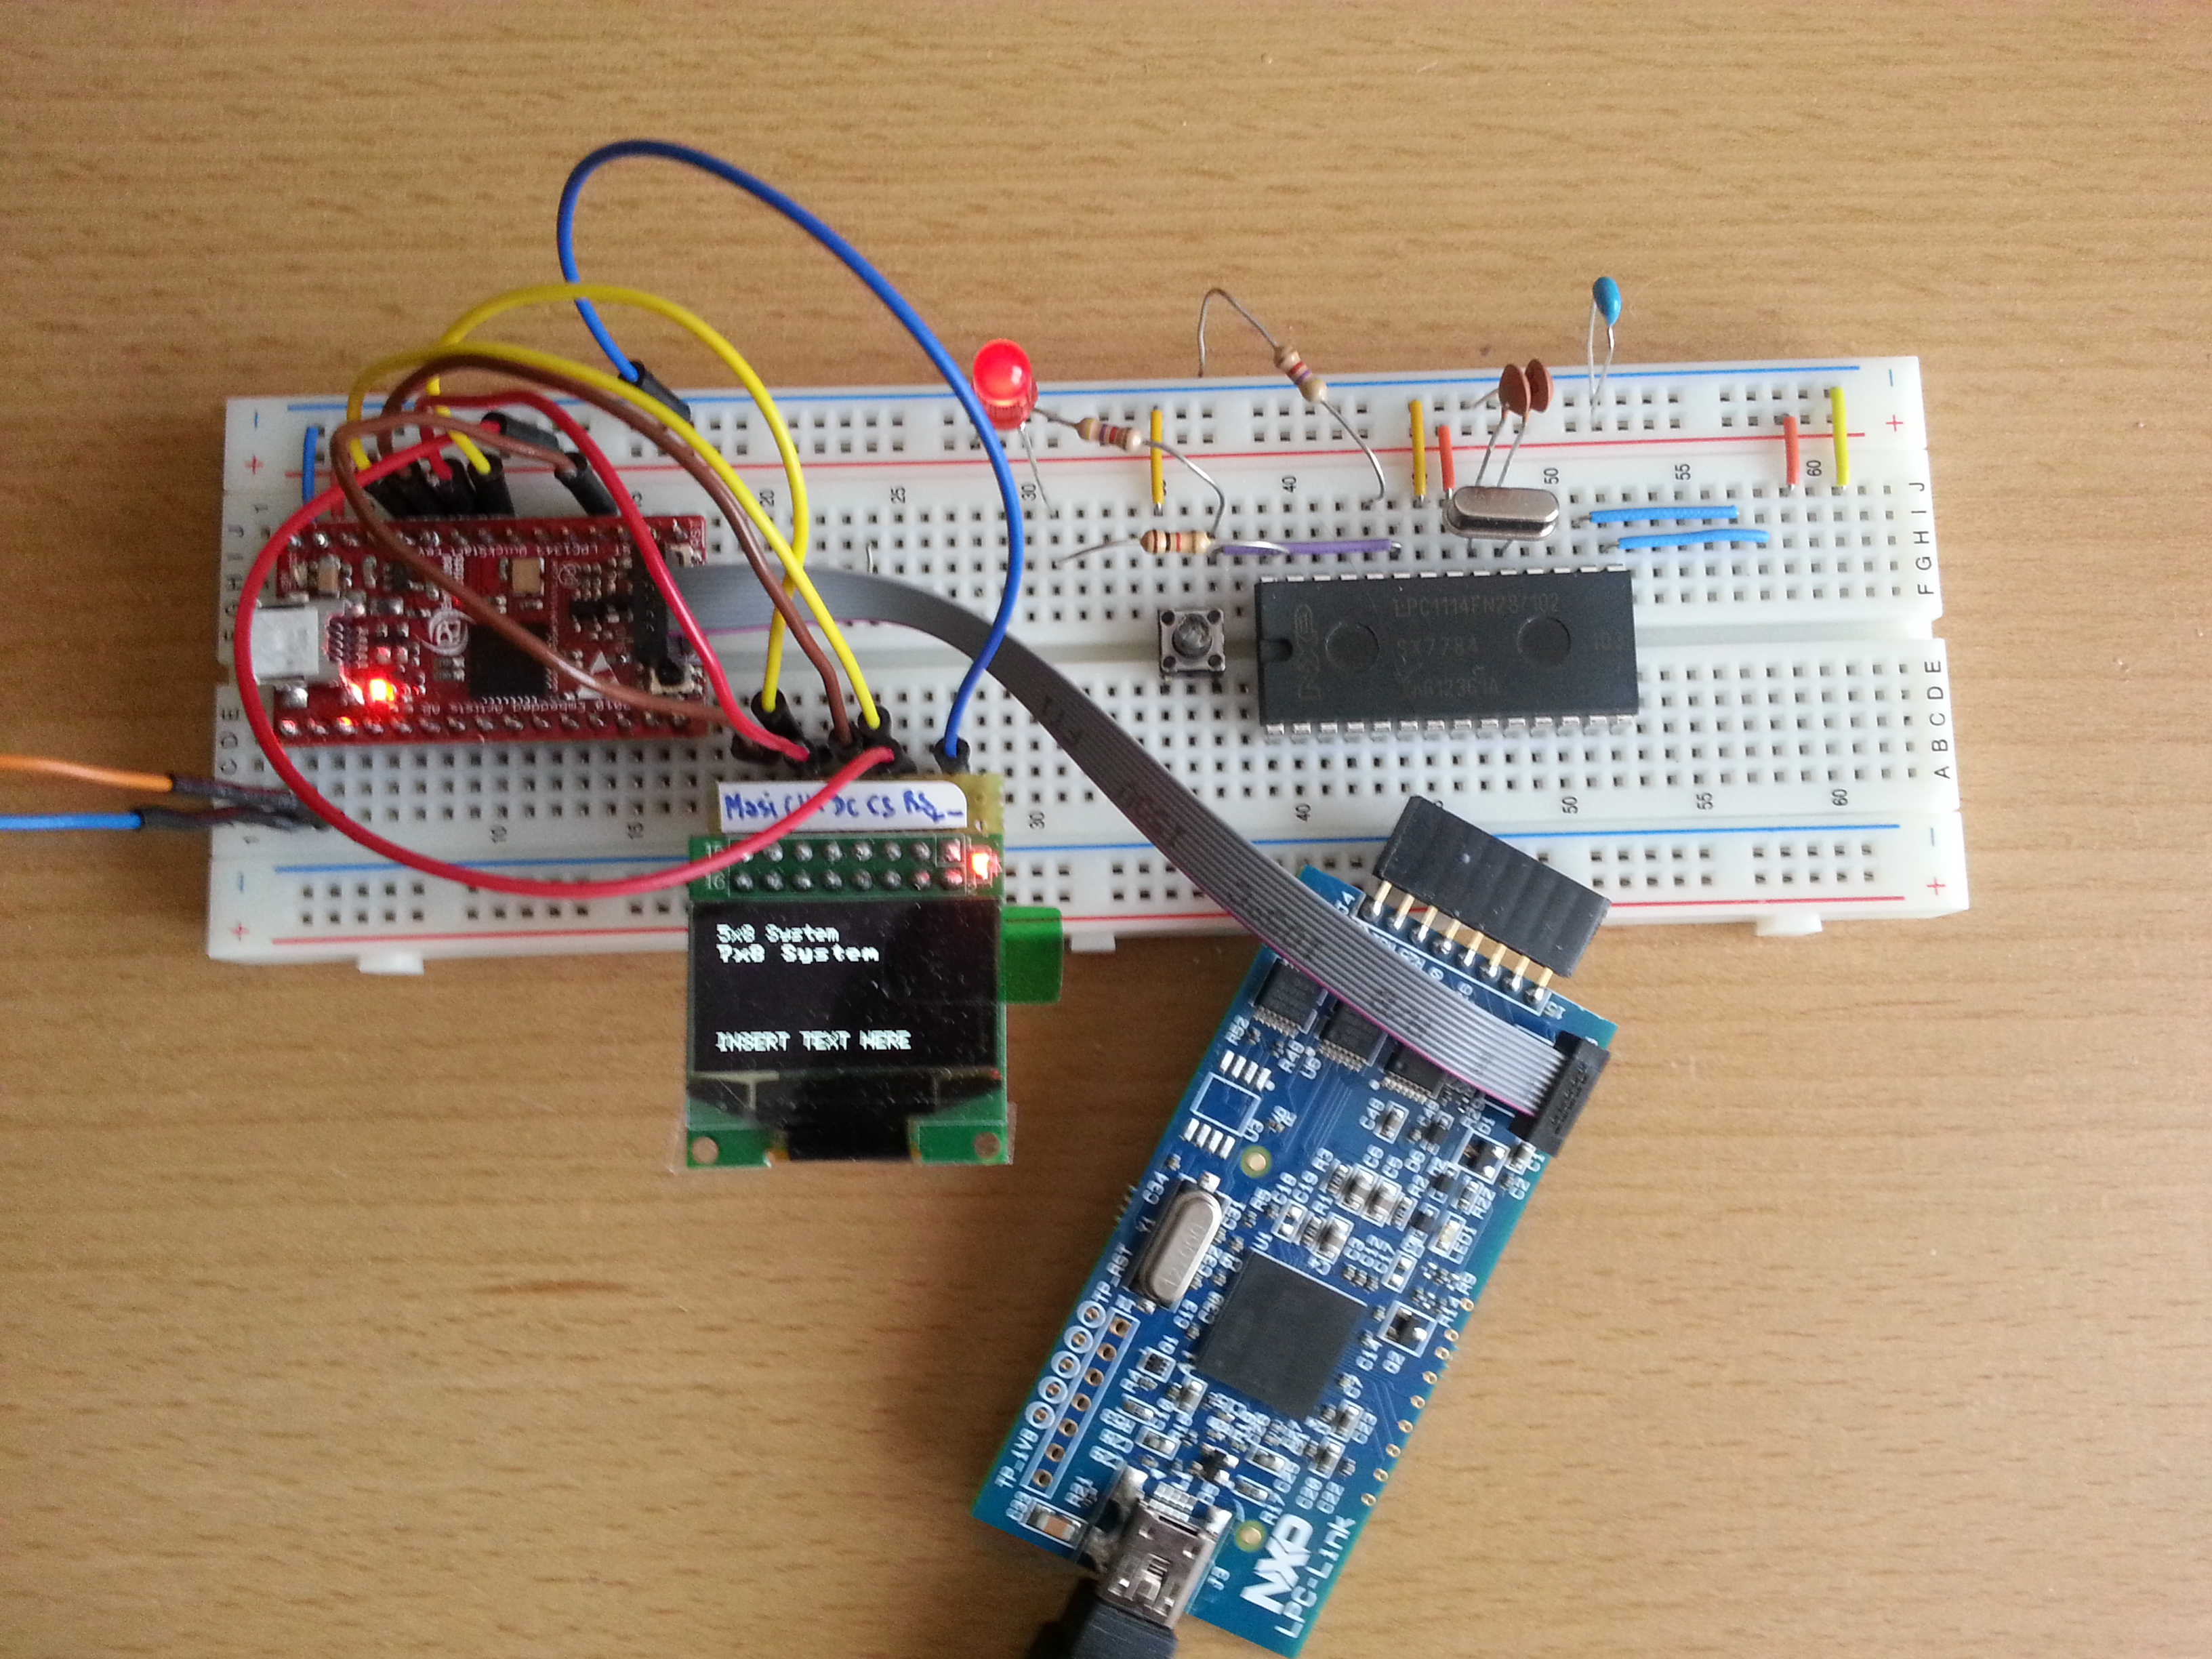
NXP also produces the LPC1114FN28, which is the only ARM- based microcontroller in a DIP package. It’s cheap and perfect for quick DIY applications. I got 2 of them from ebay just for kicks. All you need to get started is an FTDI breakout board, a couple of standard discrete components, and a code base. On the picture above, on the second half of the breadboard you can see that minimal setup with room to plug ion the FTDI board on the right. When the resistor that is floating in the air is connected to GND and the device is reset, it enters the UART bootloader mode.
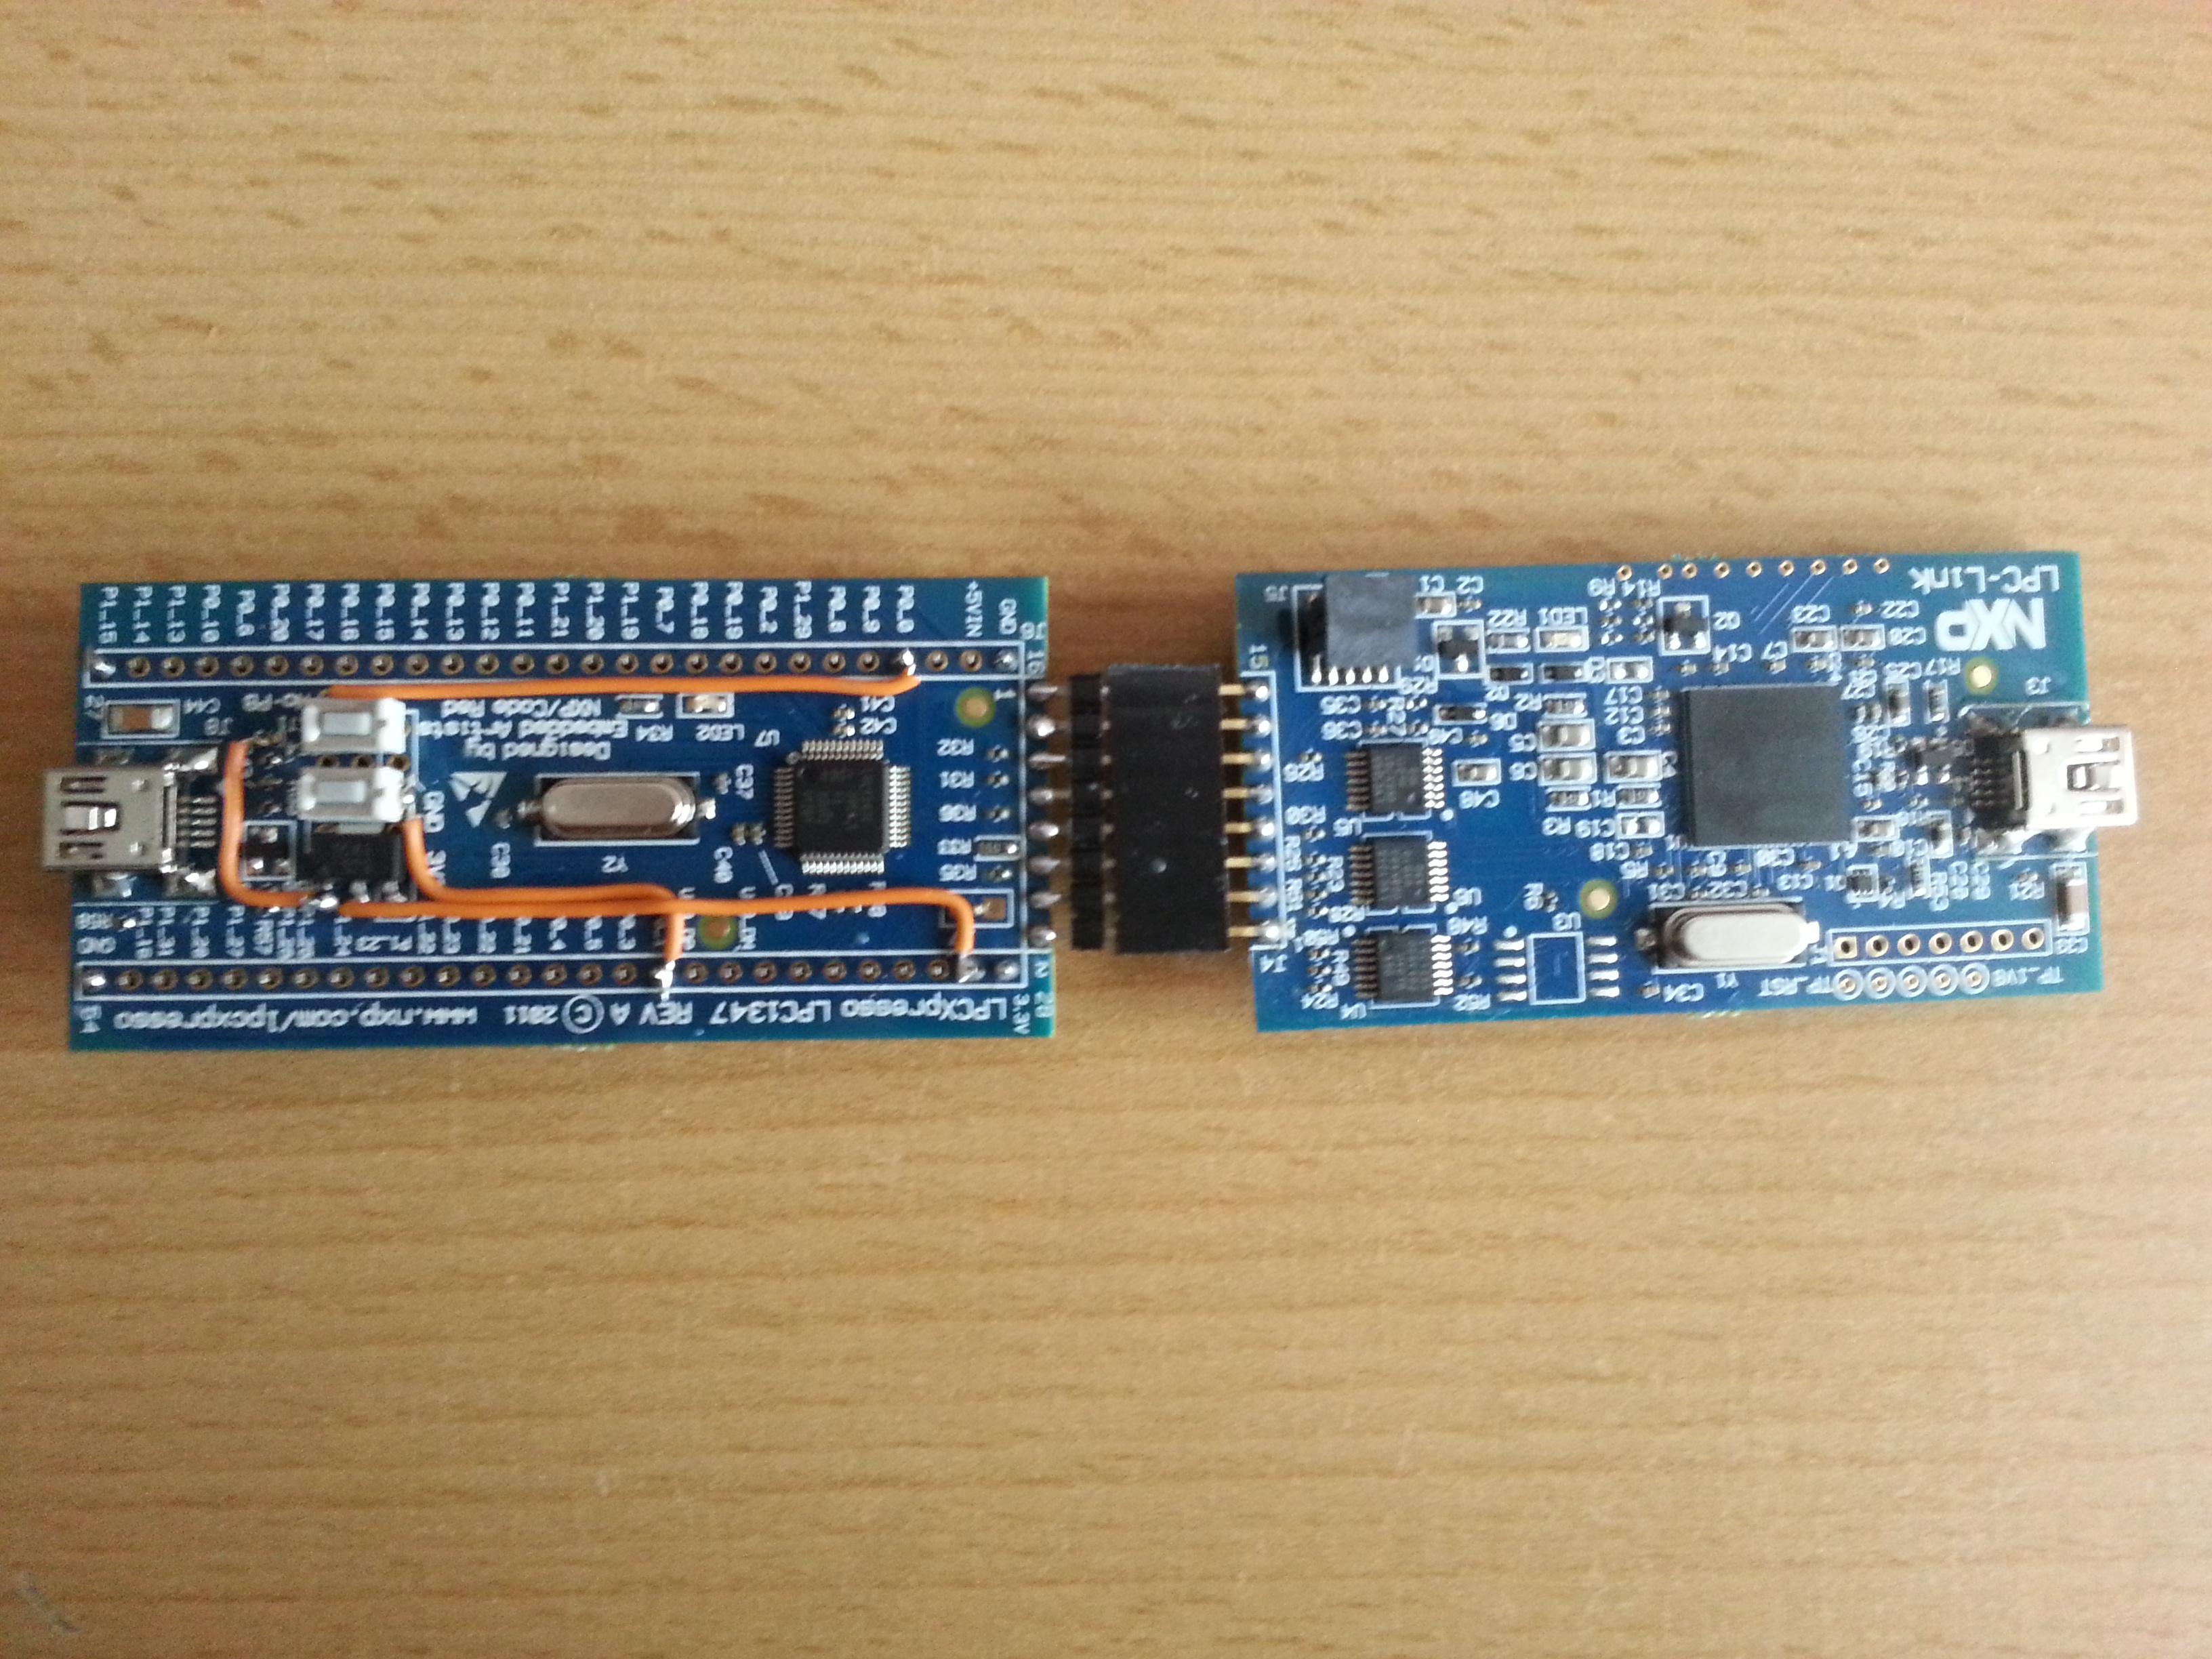
Since microbuilder is about to release a code base for the LPC1347, which has 64k flash size, 12bit ADCs, buil-in EEPROM and stuff, the LPCxpresso board I ordered had the LPC1347 target. I cut it in half right away to use the LPC-Link half for the LPC1343. The LPC1347 target portion was hacked and saved for use in future projects. I added a pulldown button to PIO0_0 (RESET) and one to PIO0_1 (USB bootloader mode, just like on the LPC1343) as well as a LM 3940 IMP-3,3 voltage regulator for getting power from the USB port.
A small step for mankind, but a somewhat bigger step for me. I discovered that the mbed platform supports the LPC1114FN28 as well as the LPC1347! Mbed is an ARM development platform with an online compiler and a greatly interconnected community with unique opportunities to share projects. One can simply browse what other people have written and use and contribute. When you compile your browser spits out a xxxxxx.bin file that you can rename to firmware.bin and load into the LPC1347 mass storage bootloader. The LPC1114FN28 breadboard platform as seen above can be used with Flash Magic, but you need a bin to hex converter. Everything is explained under the platforms section.
Conclusion
The NXP LPCs seem to be a good platform to start from if you would like to migrate to ARM or a 32bit platform. I thought it might also be a good opportunity to familiarize oneself with the jtag hardware debugging concept, which you do not encounter if you stick to Arduino alone. Of course there is the question,how big the user community is / will be, since sharing code is quite important, but on the other hand: ARM processors are more fluid in executing C code and handling 32bit integers, so if you have a code base such as the one that is available from microbuilder, you should be able to accomplish quite a bit. Microbuilder has also got a great forum where you are really helped out if you have any issues.
The possibility to use the mbed copiler for the LPC1347 and the LPC1114FN28 opens some great opportunities for ARM-based projects. Its simplicity of use should make tinkering with ARM chips much easier.
One way to start: the LPC1114FN28 can be programmed using the Seeeduino Arch (a quite cheap arduino-shaped LPC11U24 board) as a SWD programmer to drag in .bin files from the mbed compiler. Check out this mbed page.

I found the LPC1114FN28 very useful and so it was made Arduino-compatible by soldering it on a proto shield PCB and breakung out all the pins that are protocol-compatible. For example ADC-pins (The LPC1114FN28 only has 5 of them), SPI, I2C and UART are pin compatible now. As a power supply almost any battery can be connected (2-11 V), since an efficient 5V pololu boost/buck switching regulator is soldered onto the board. A 3.3V LDO linear regulator supplies the microcontroller.
